It’s my Mood forever....

In July I found out that I was selected to be part of the Mood Sewing Network for the next 3 months! Instantly I was excited, then I was like “what am I going to make?” I felt the pressure, and I definitely didn’t want to sleep on this huge opportunity I had been given.
After confiding in some of my other sewist friends and revisiting my Pinterest boards (which I was on for hours!) I finally came up with a concept. My main goal is to be as original as possible, during my 3 month residence I don’t want to work from any pattern company’s design but use my fashion background and follow flat pattern or draping methods to draft my designs. I want to create looks that will reflect my personal aesthetic as well as showcase my technical skills in the garment.

My original sketch
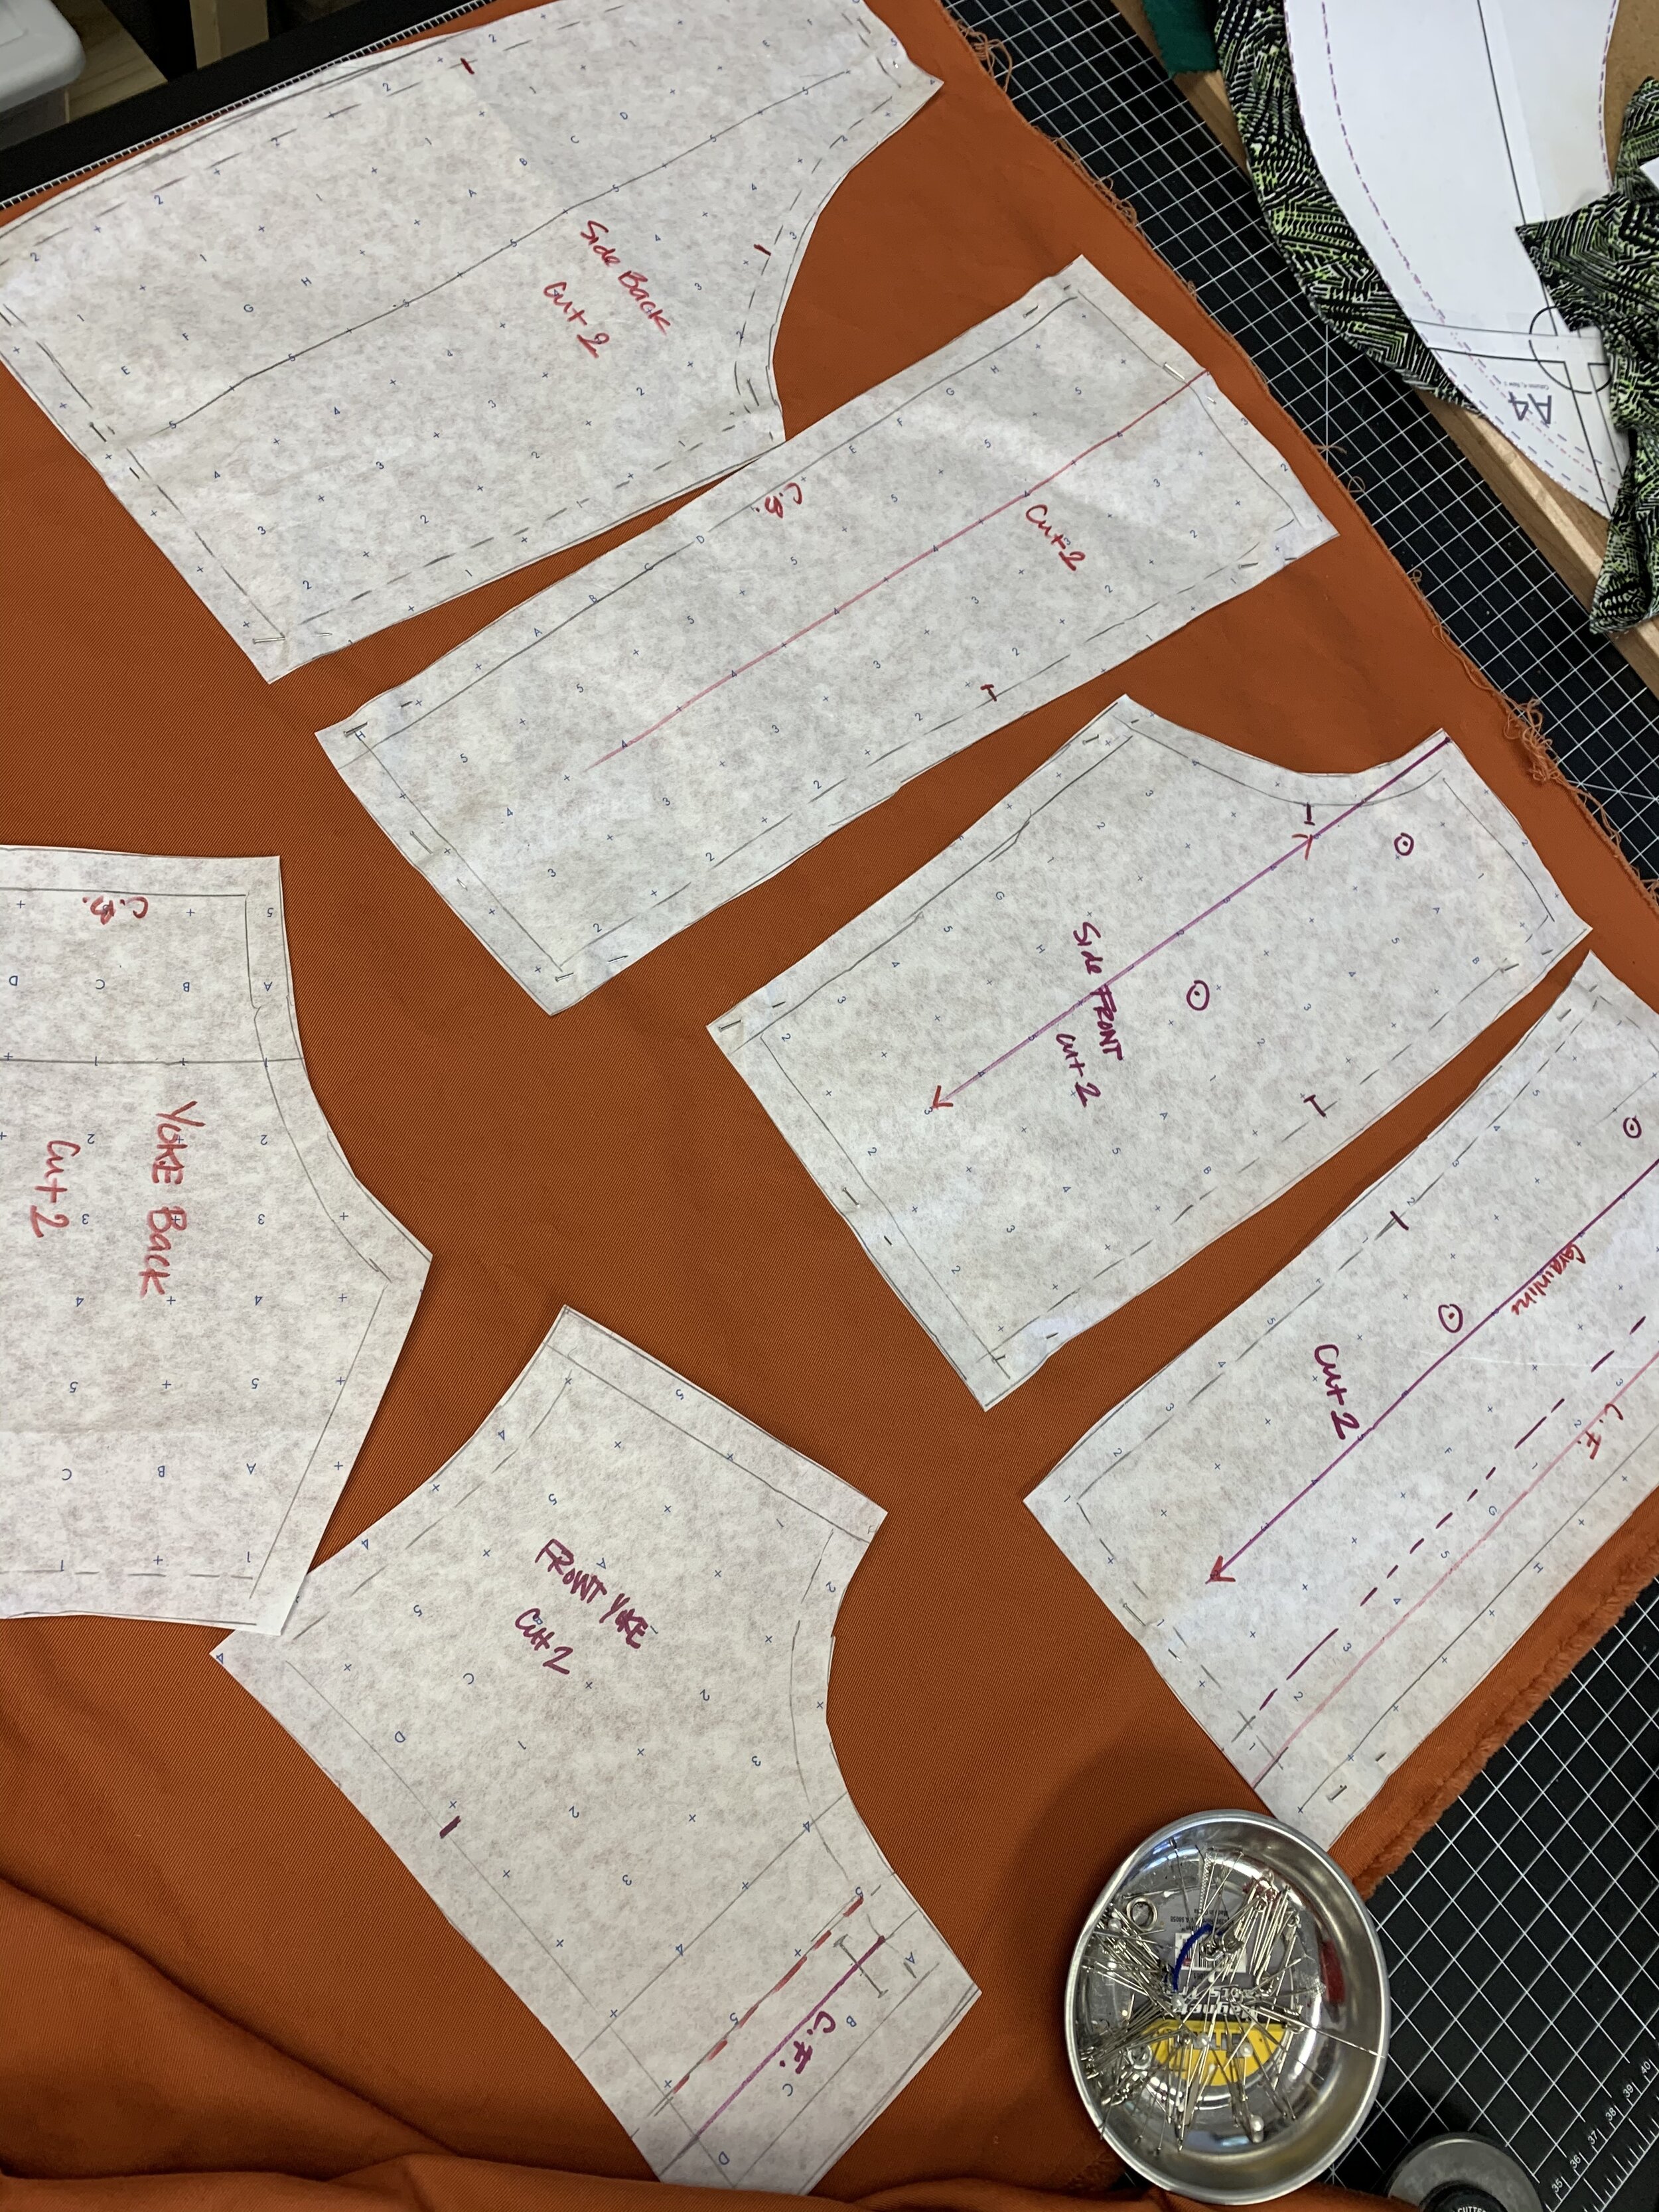
Now that I had my concept and sketch it was time to create my pattern. I started by using a bodice pattern as sloper and made a muslin mockup and pinned it to my dress form. From there I was able to drape the sleeve additions and mark my style lines that was interpreted from my original sketch. Pro tip: when making your muslin be sure to transfer important info such as your grainline and center front info etc.
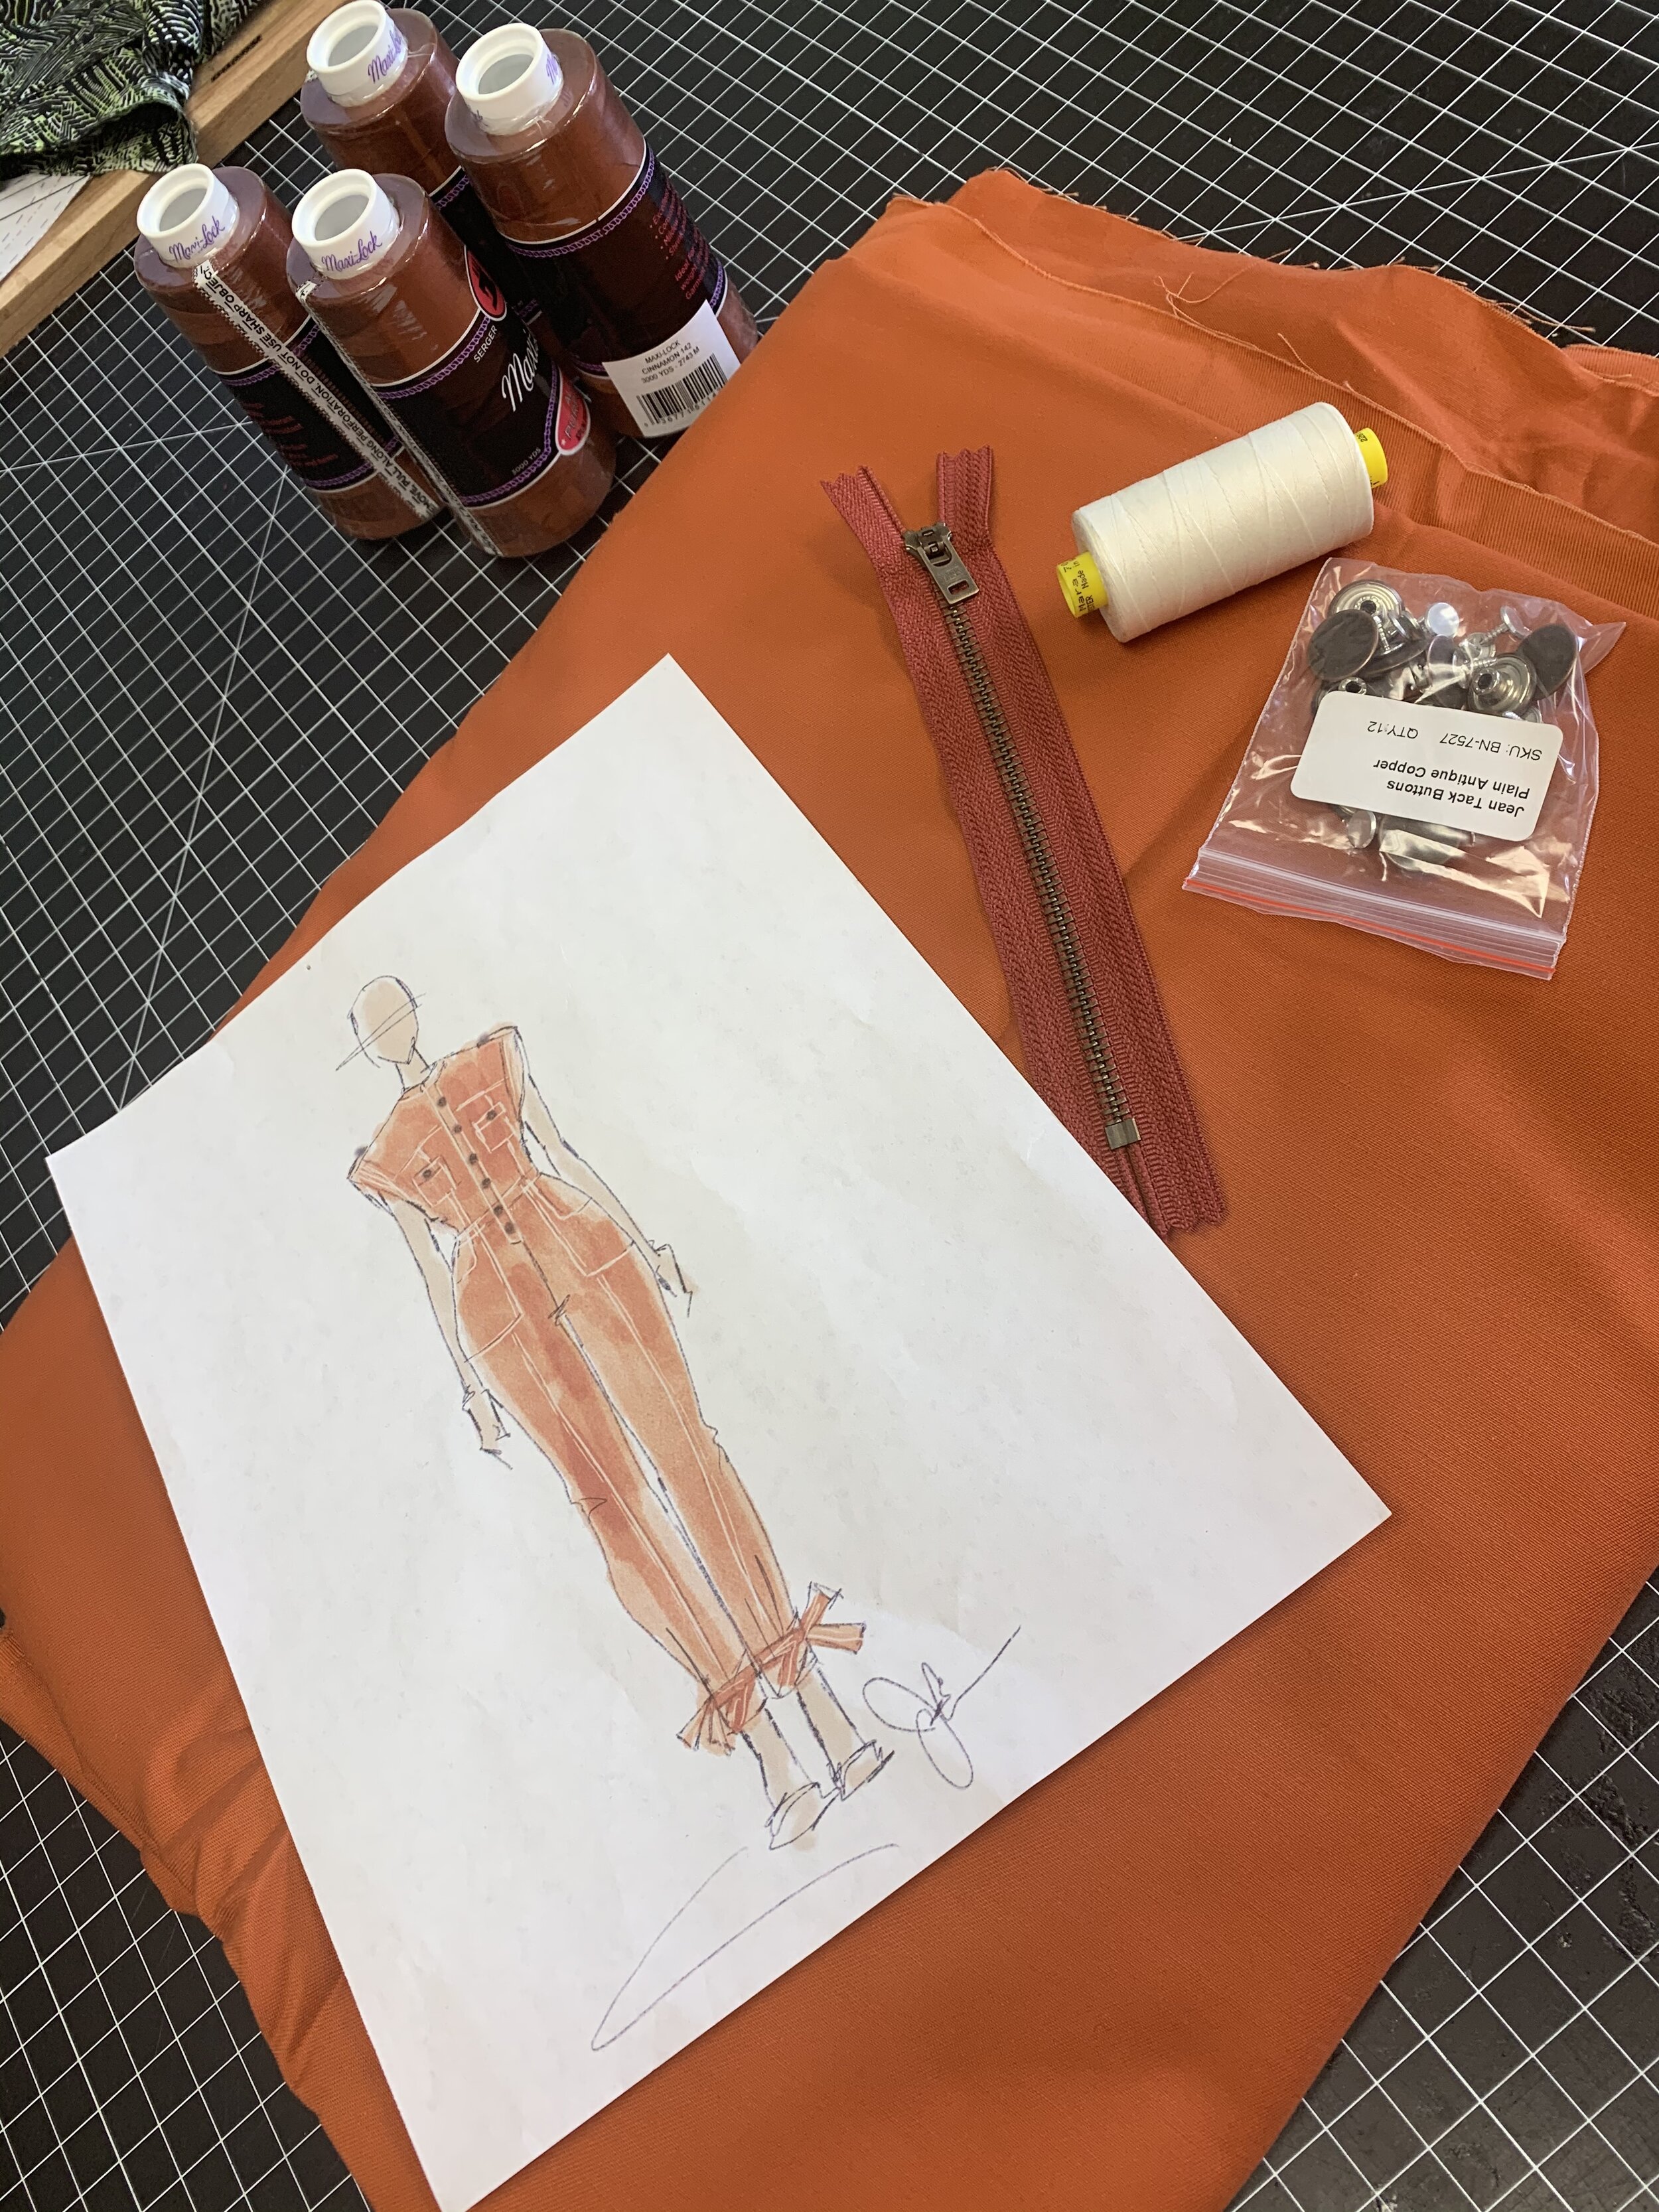
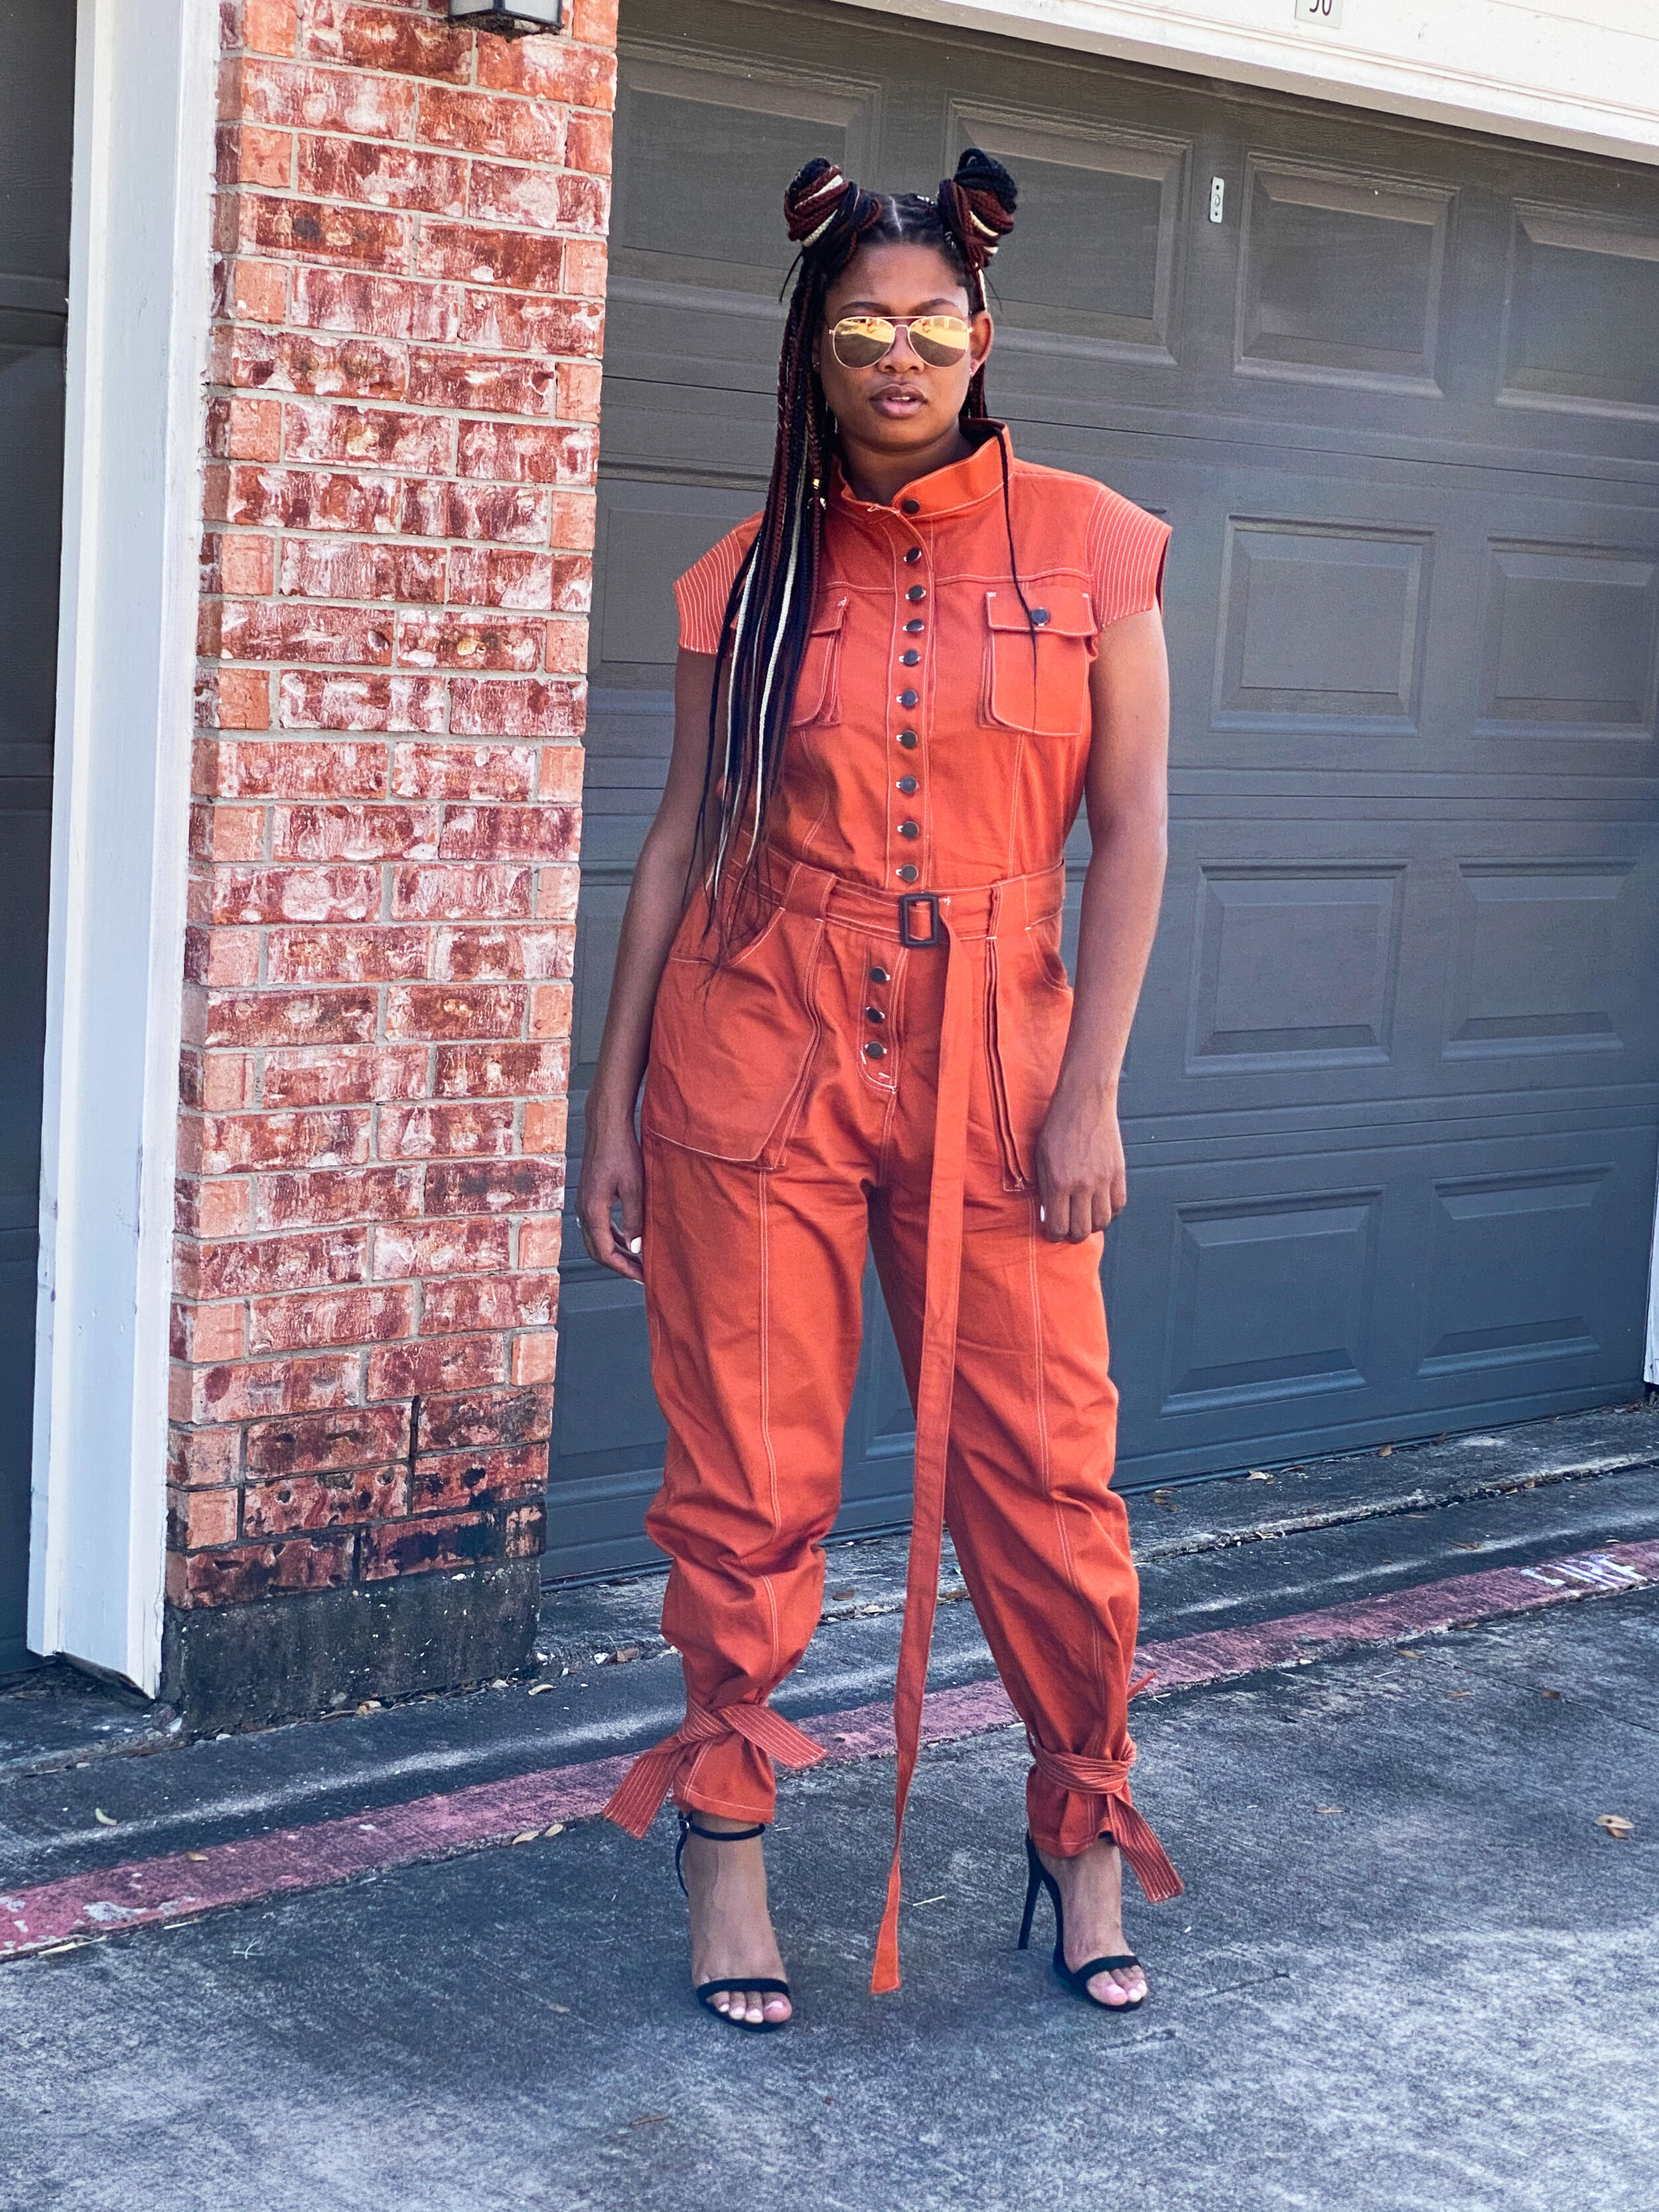
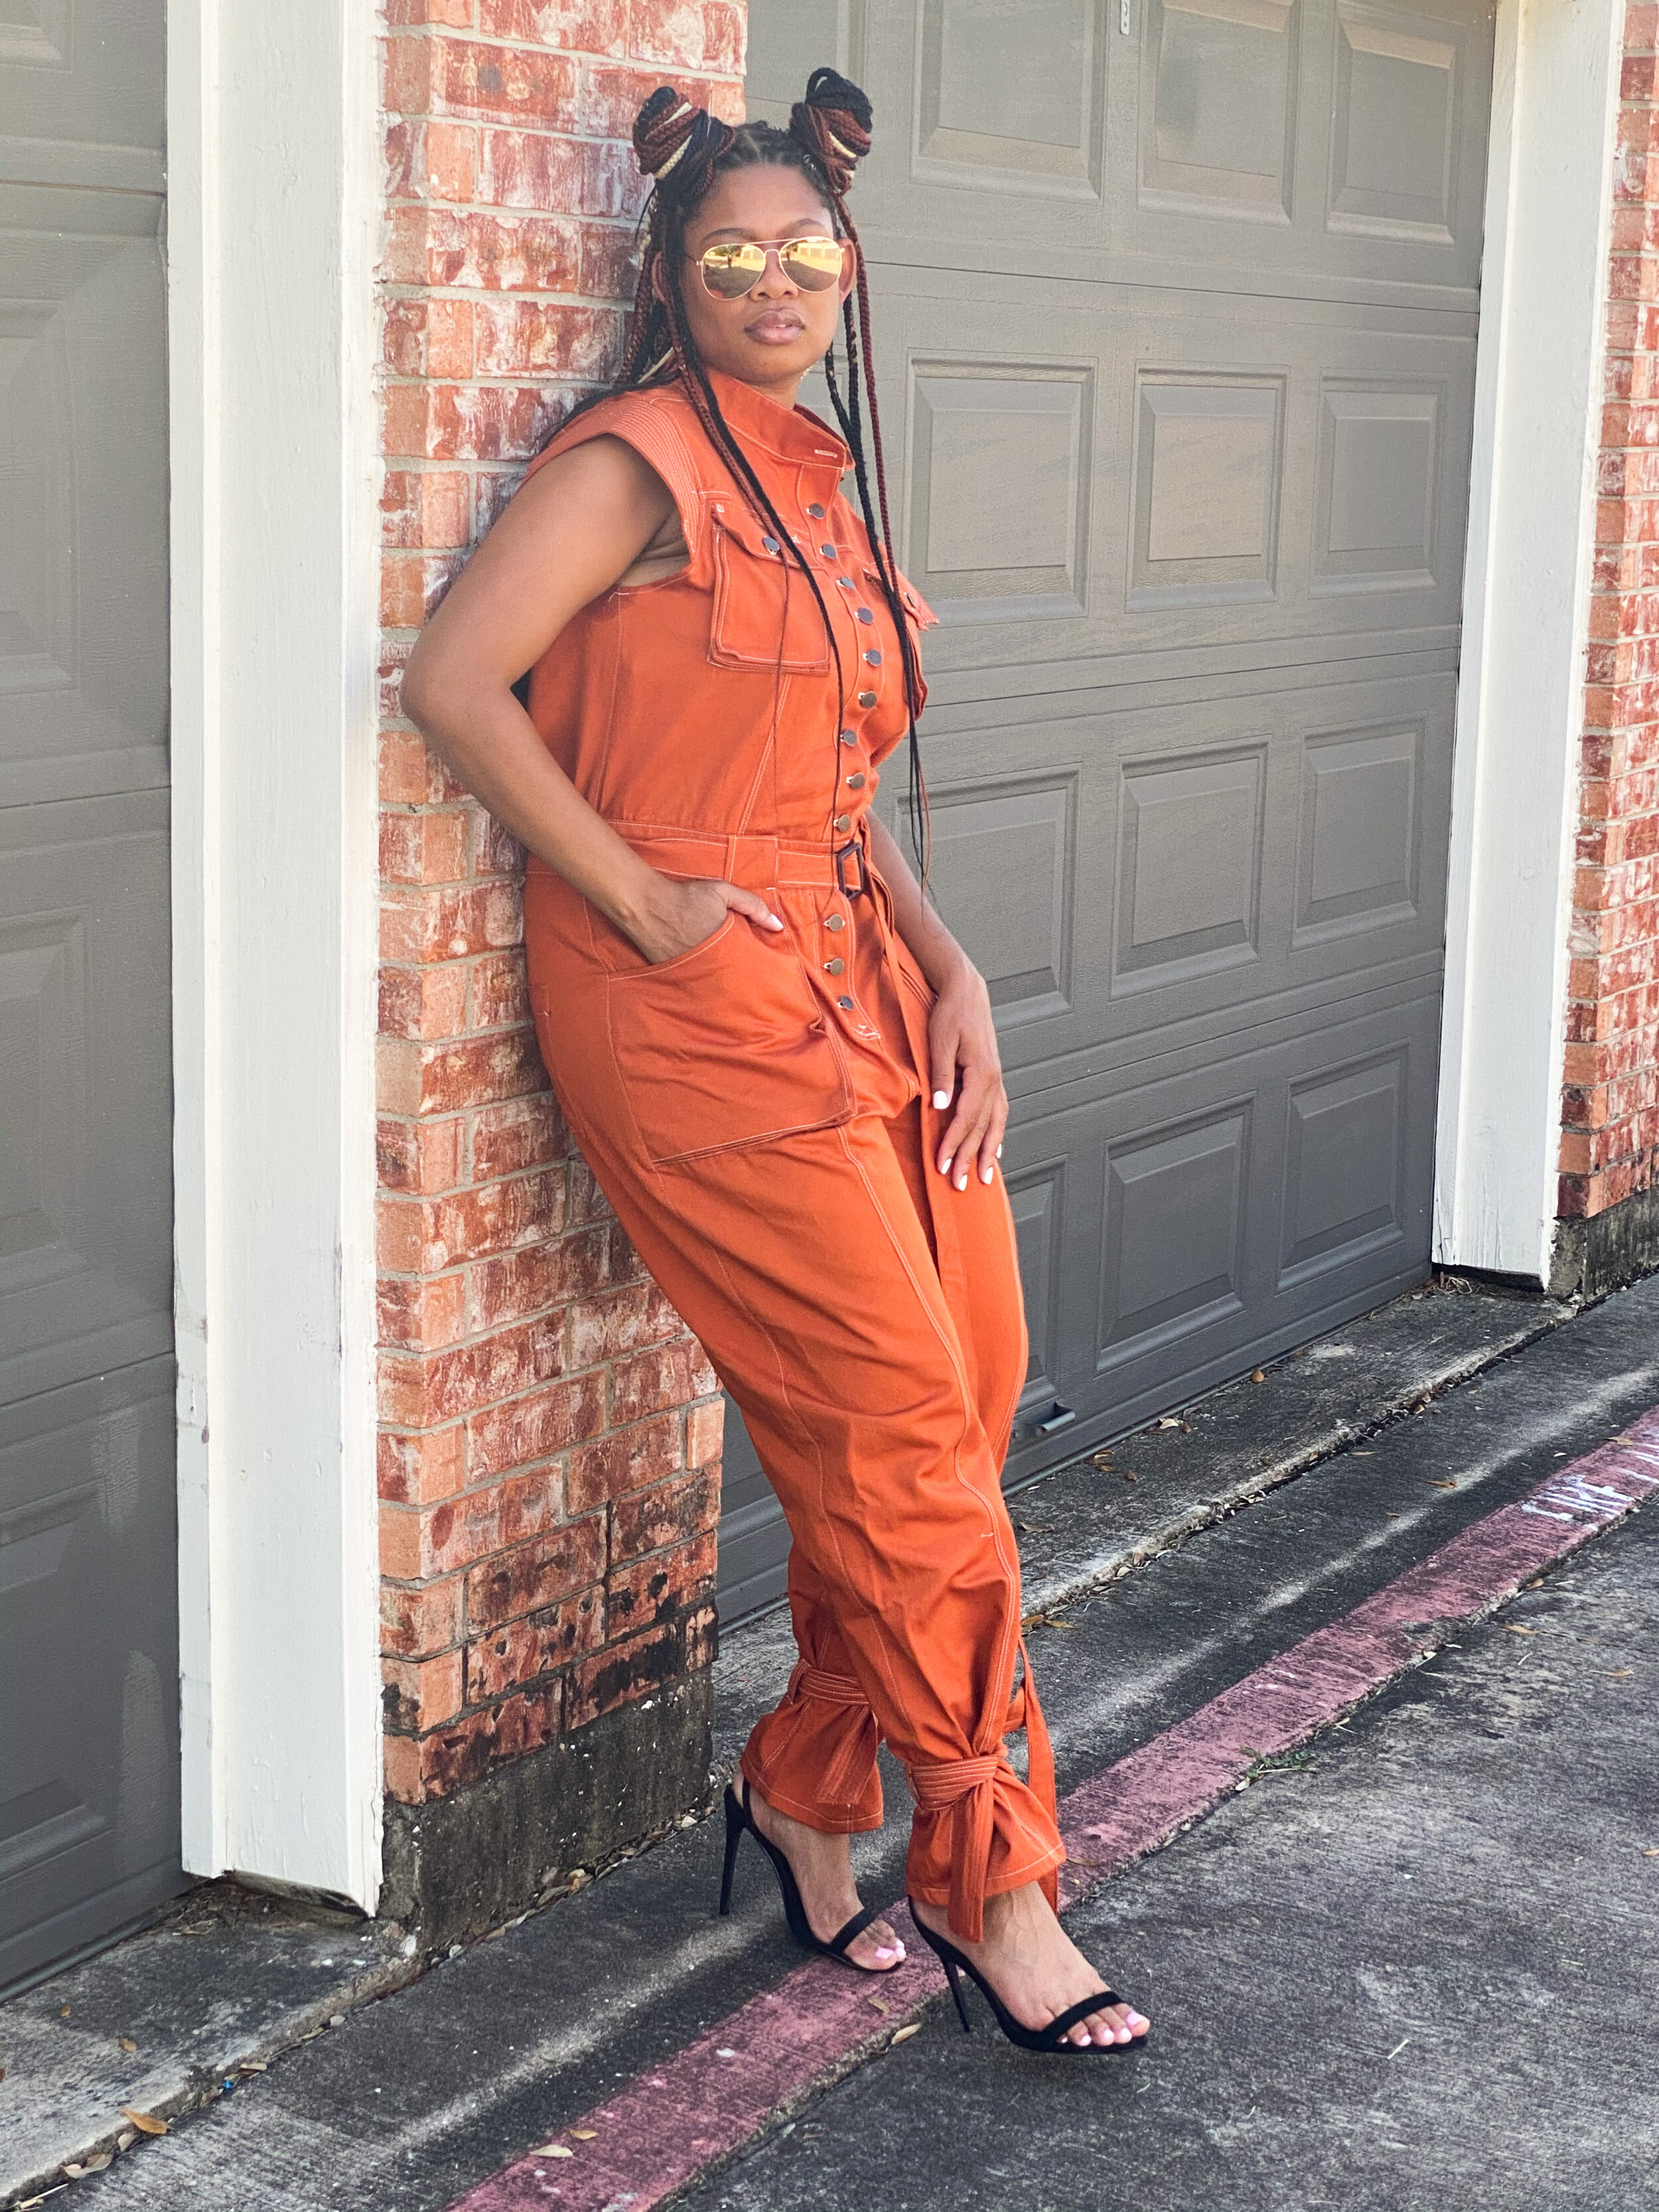
I used 4 yards this gorgeous organic cotton twill from Mood.com in the color “Sweet Potato” #FC8706 and purchased all of my notions from Wawak.com
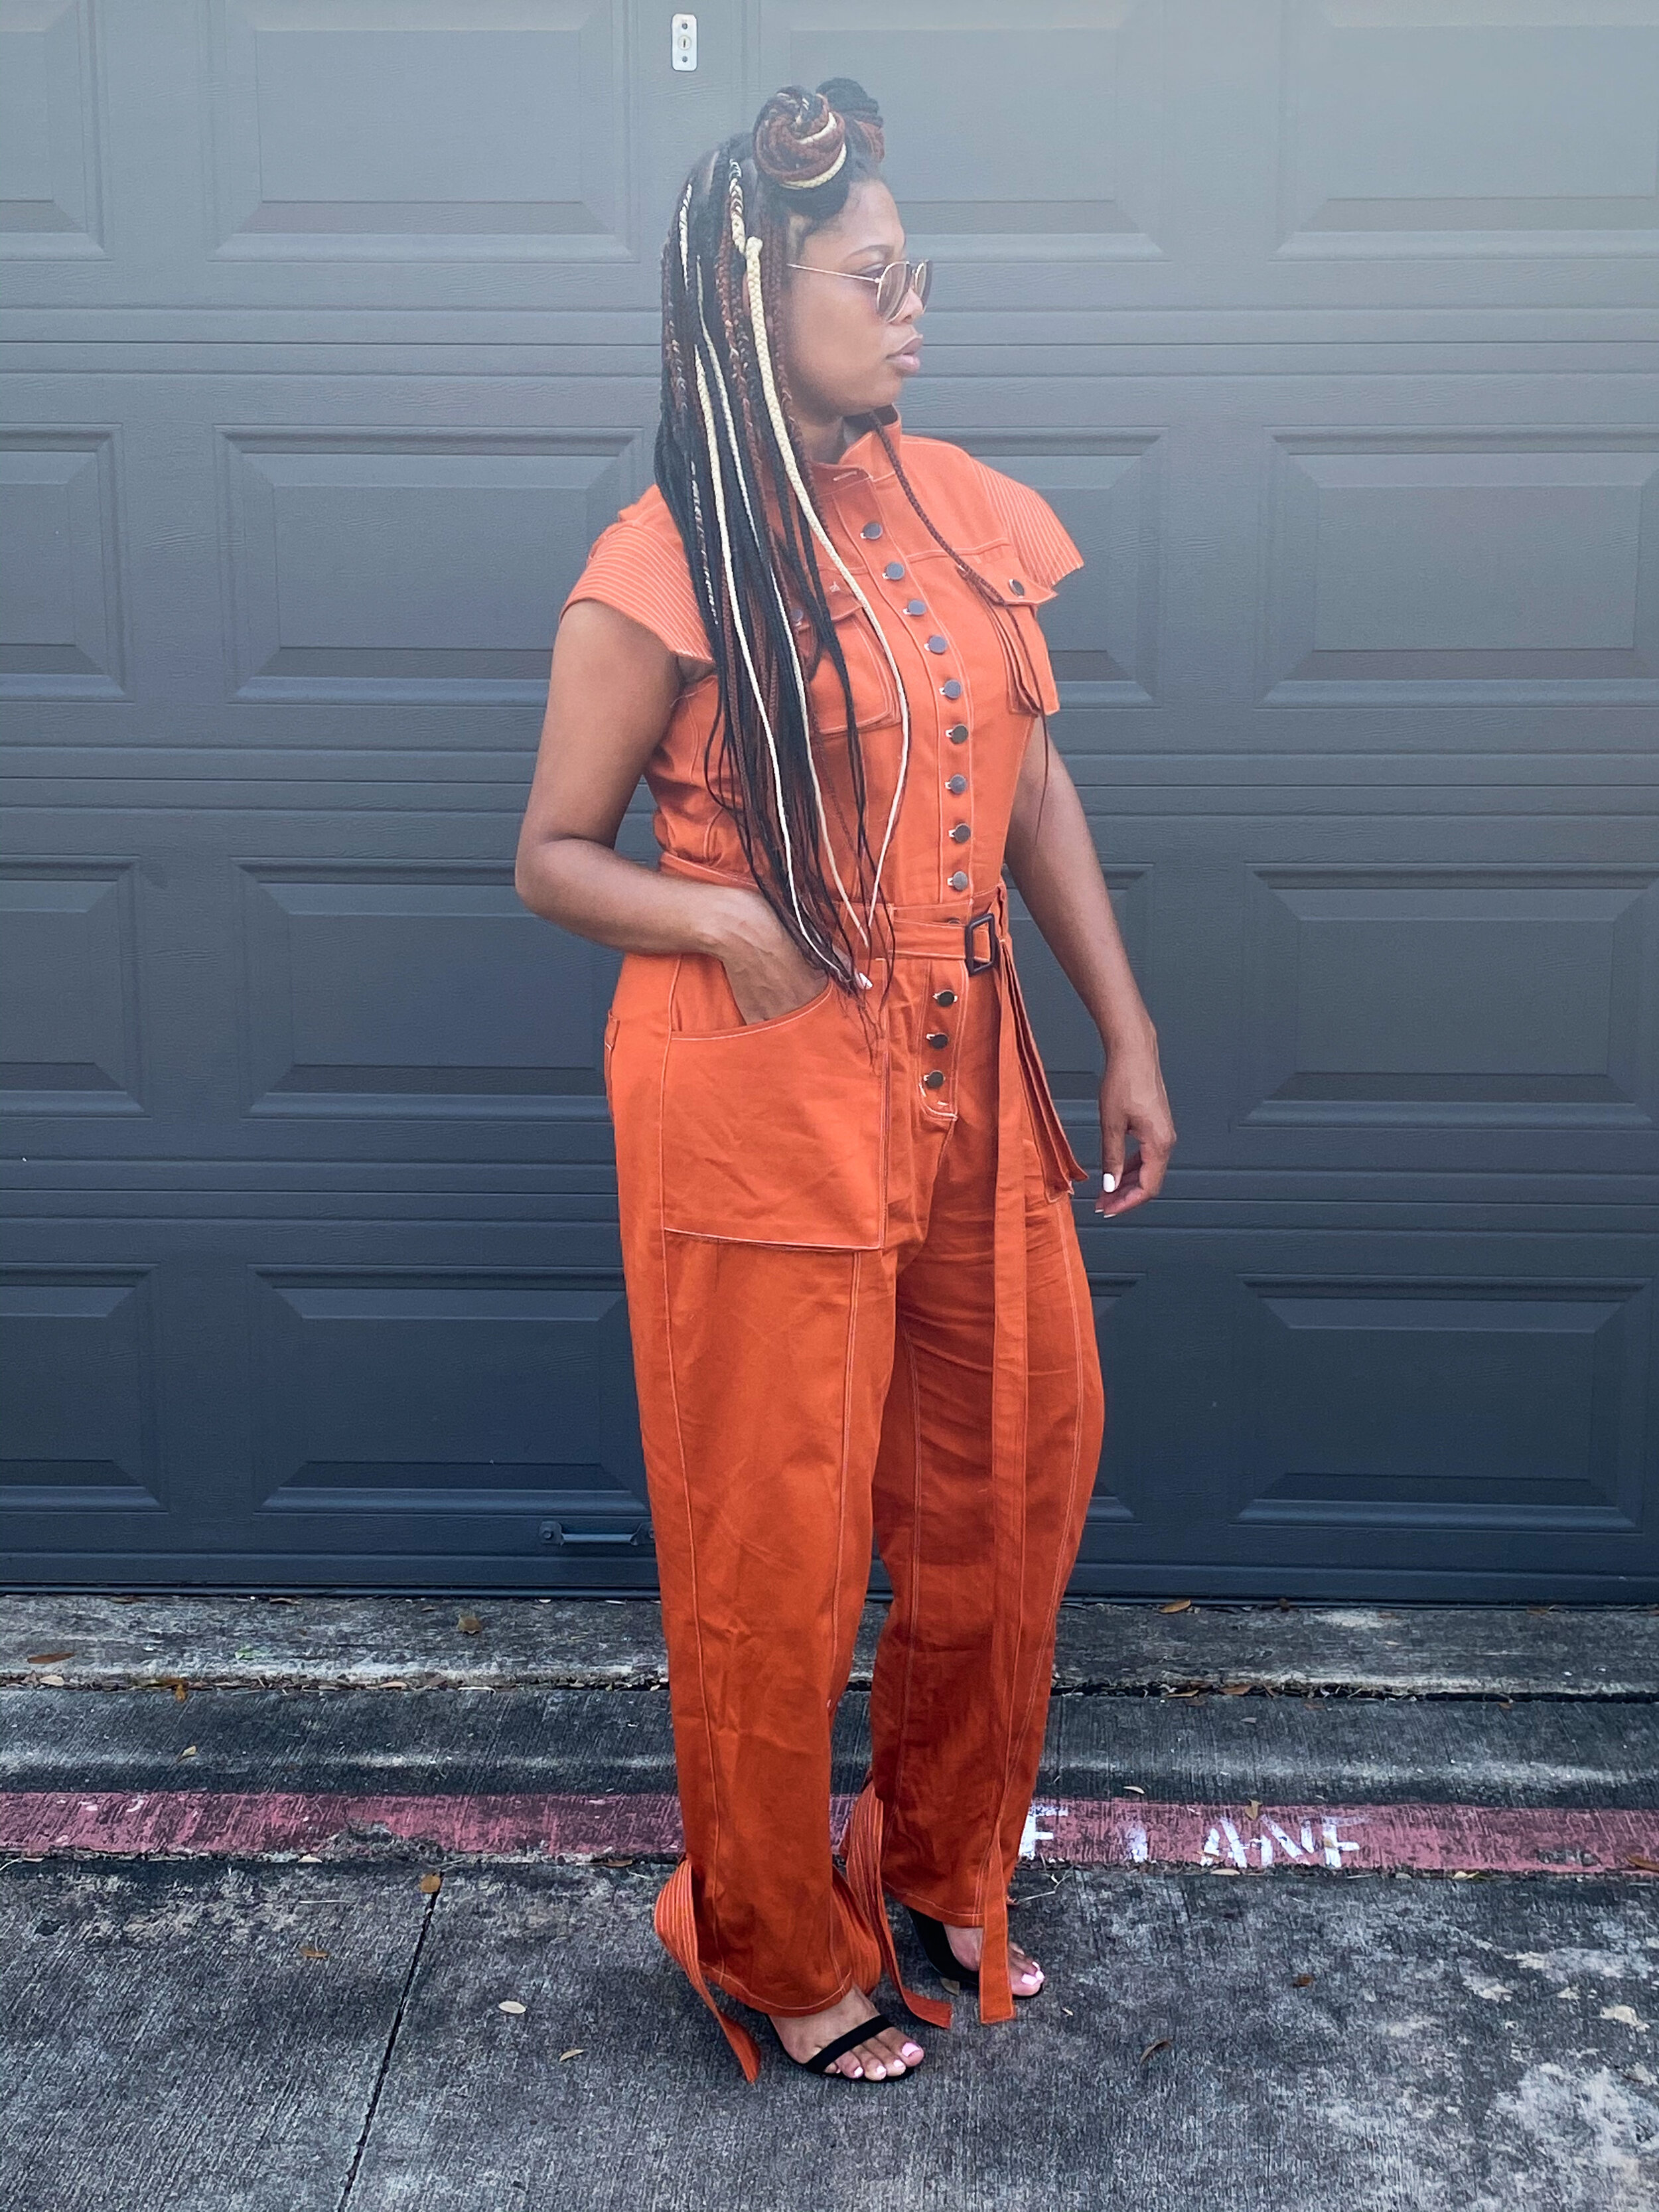
The best part of this project was that it was zero waste. I was able to use up all of my fabric with little to no scraps left.
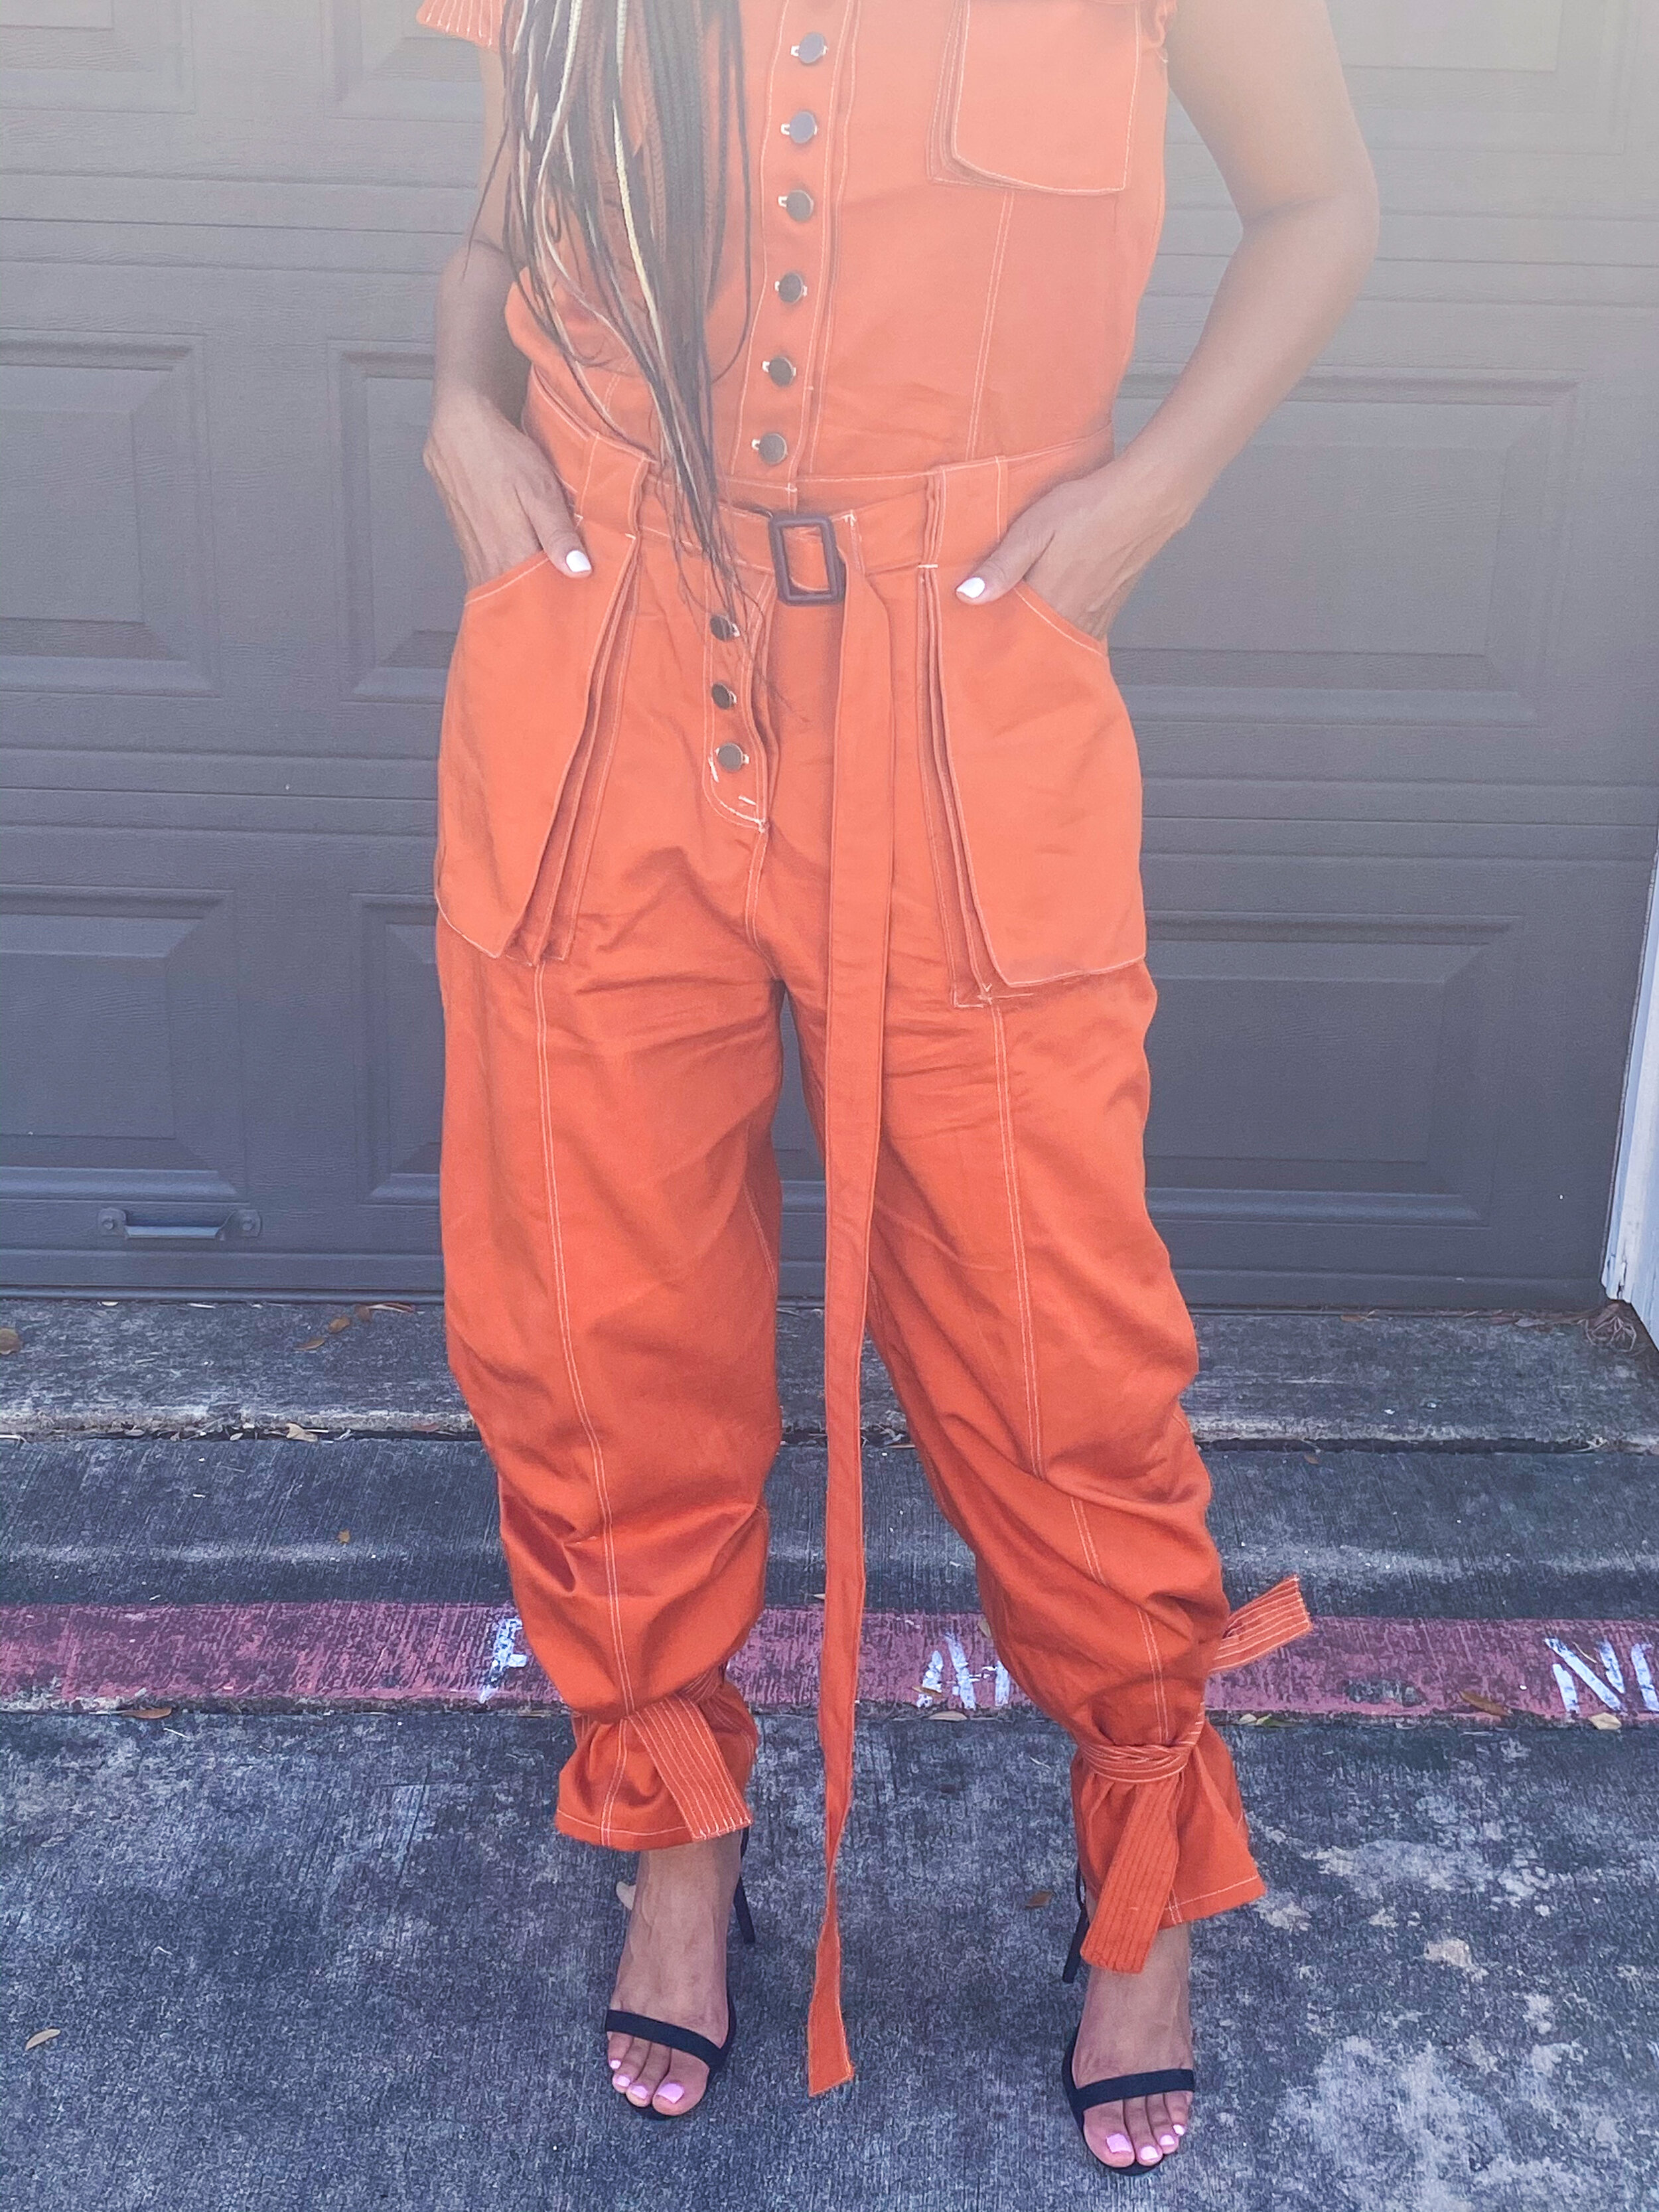
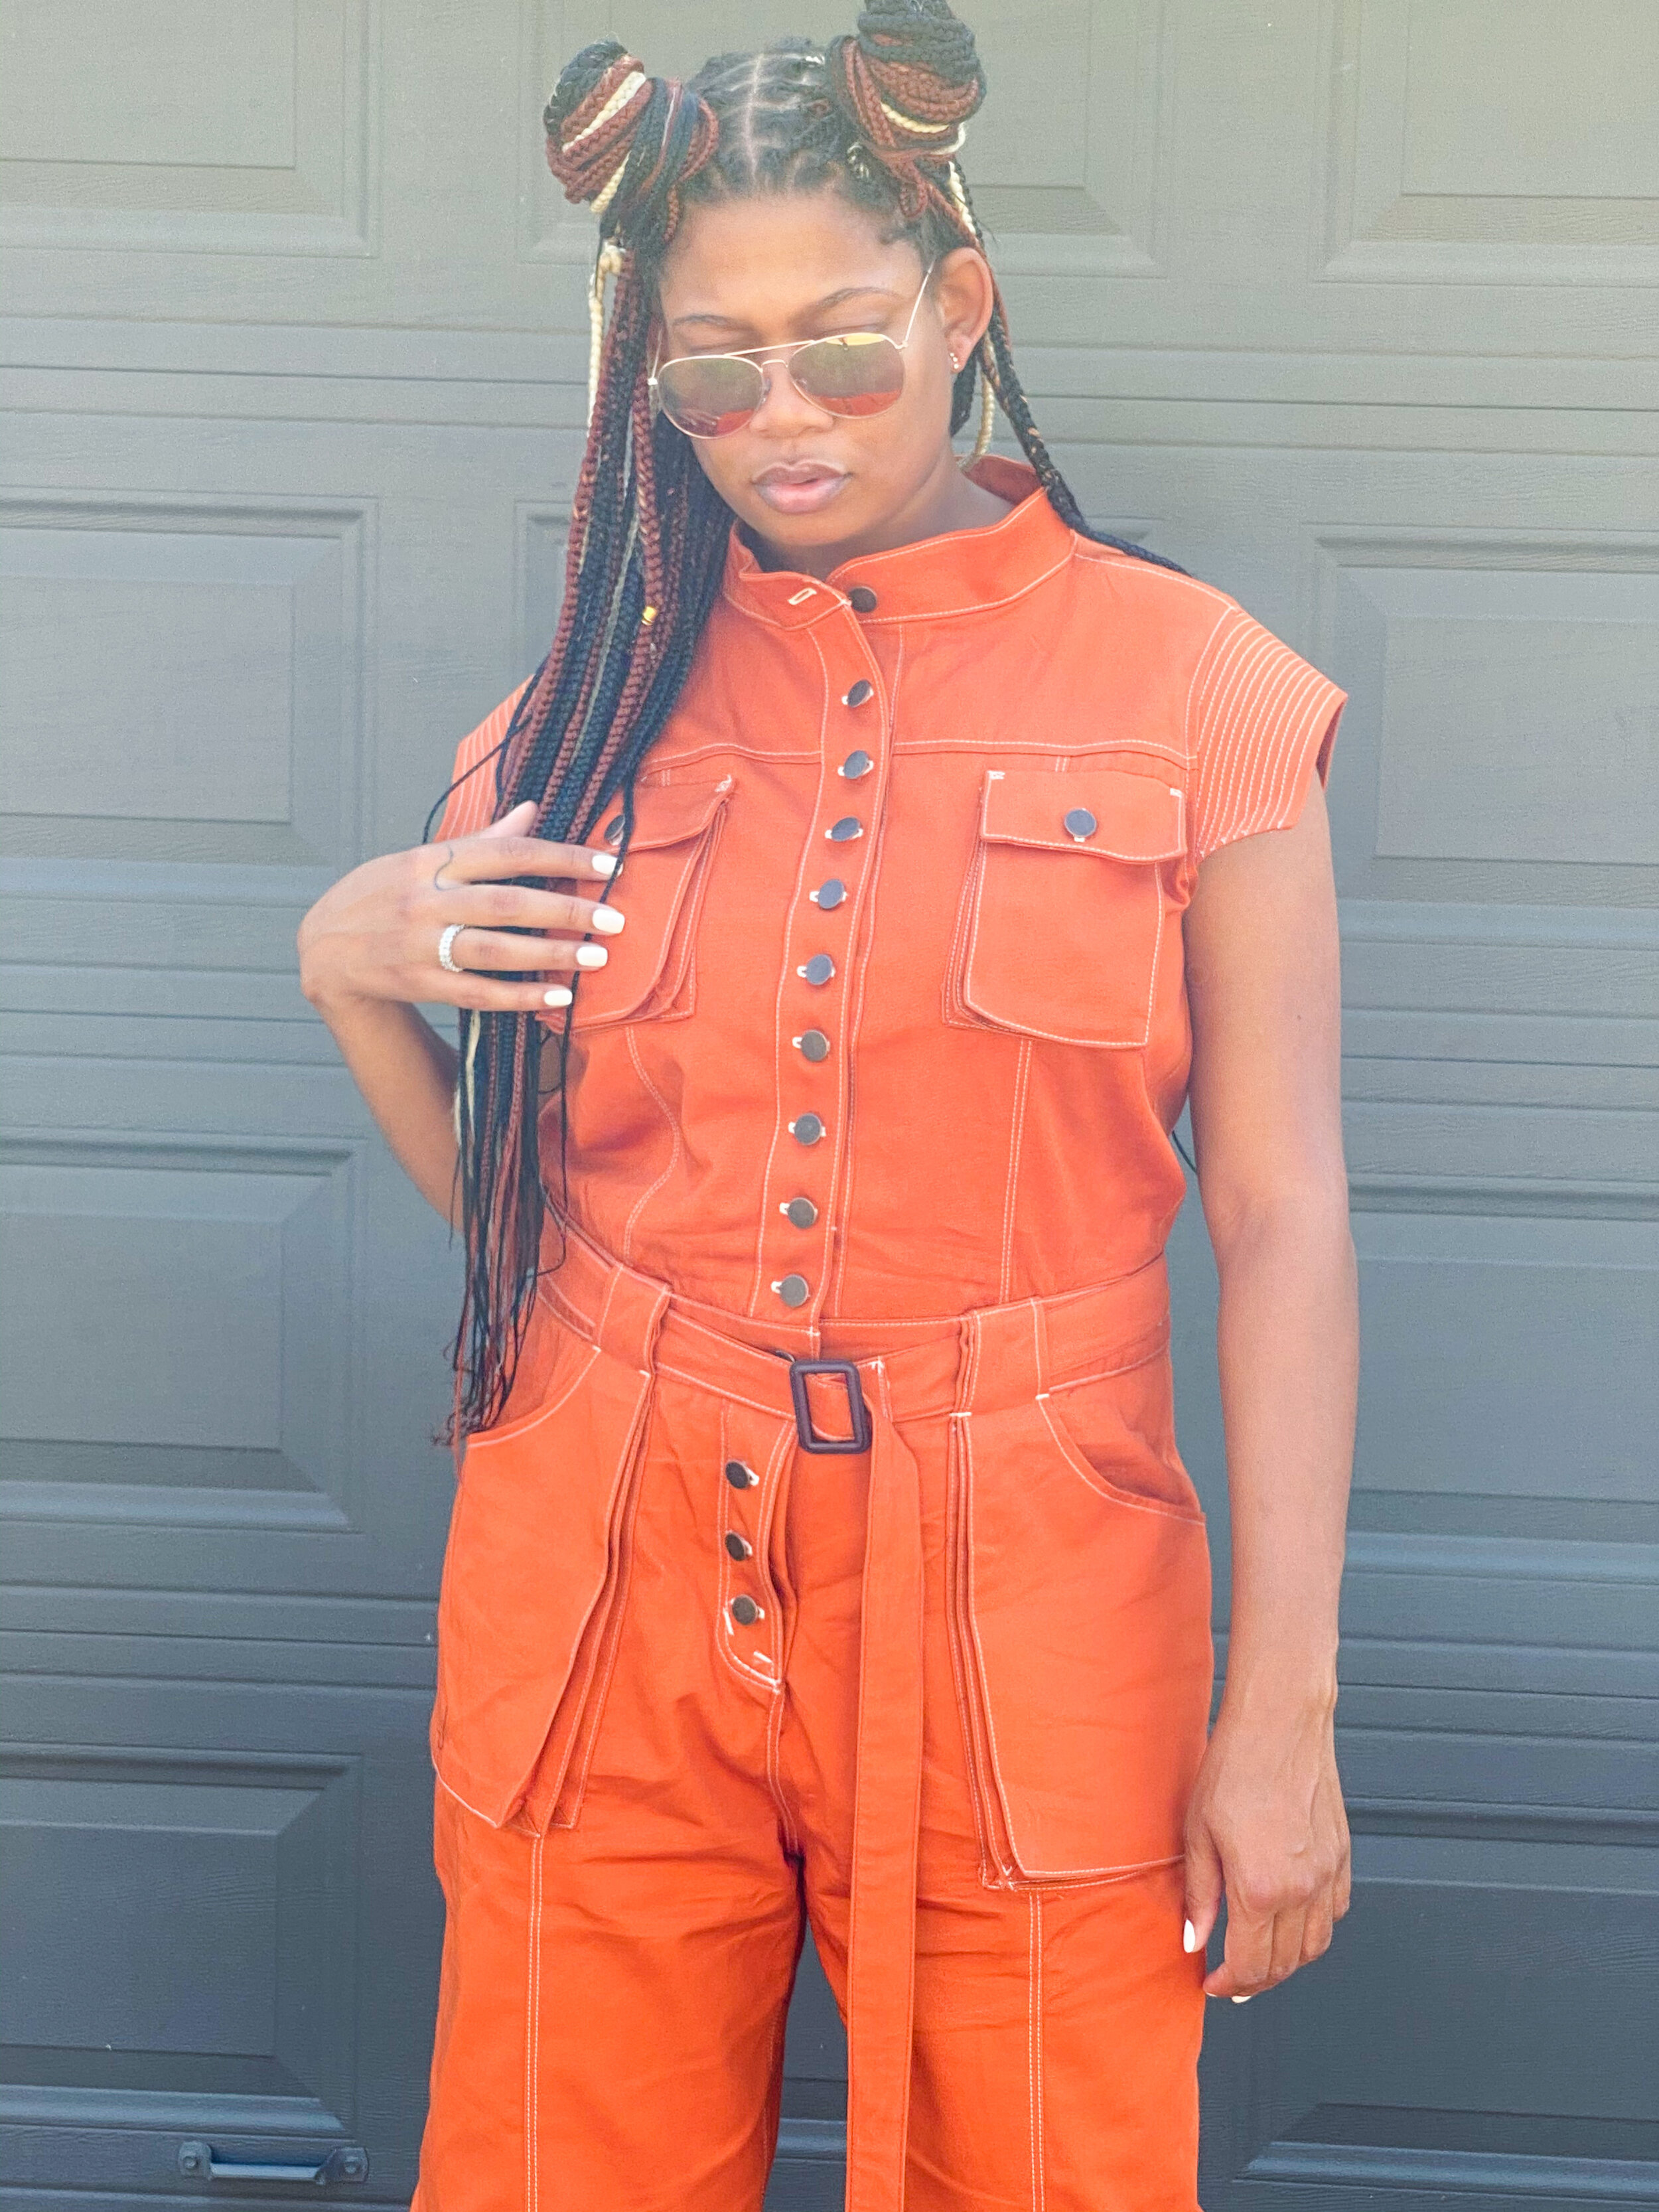
Since I was not following a pattern the most difficult thing for me was figuring out how I wanted to do the closure on the pants. My sketch has buttons going all the way down but I did not want a button fly (I have a fear of them popping open while wearing) but still keep the look of the button fly. What I ended up doing was creating a double fly, it kept the look of the button fly on the outside while adding a zip to the inside of the fly.

Transferring all of my marking to the center front.
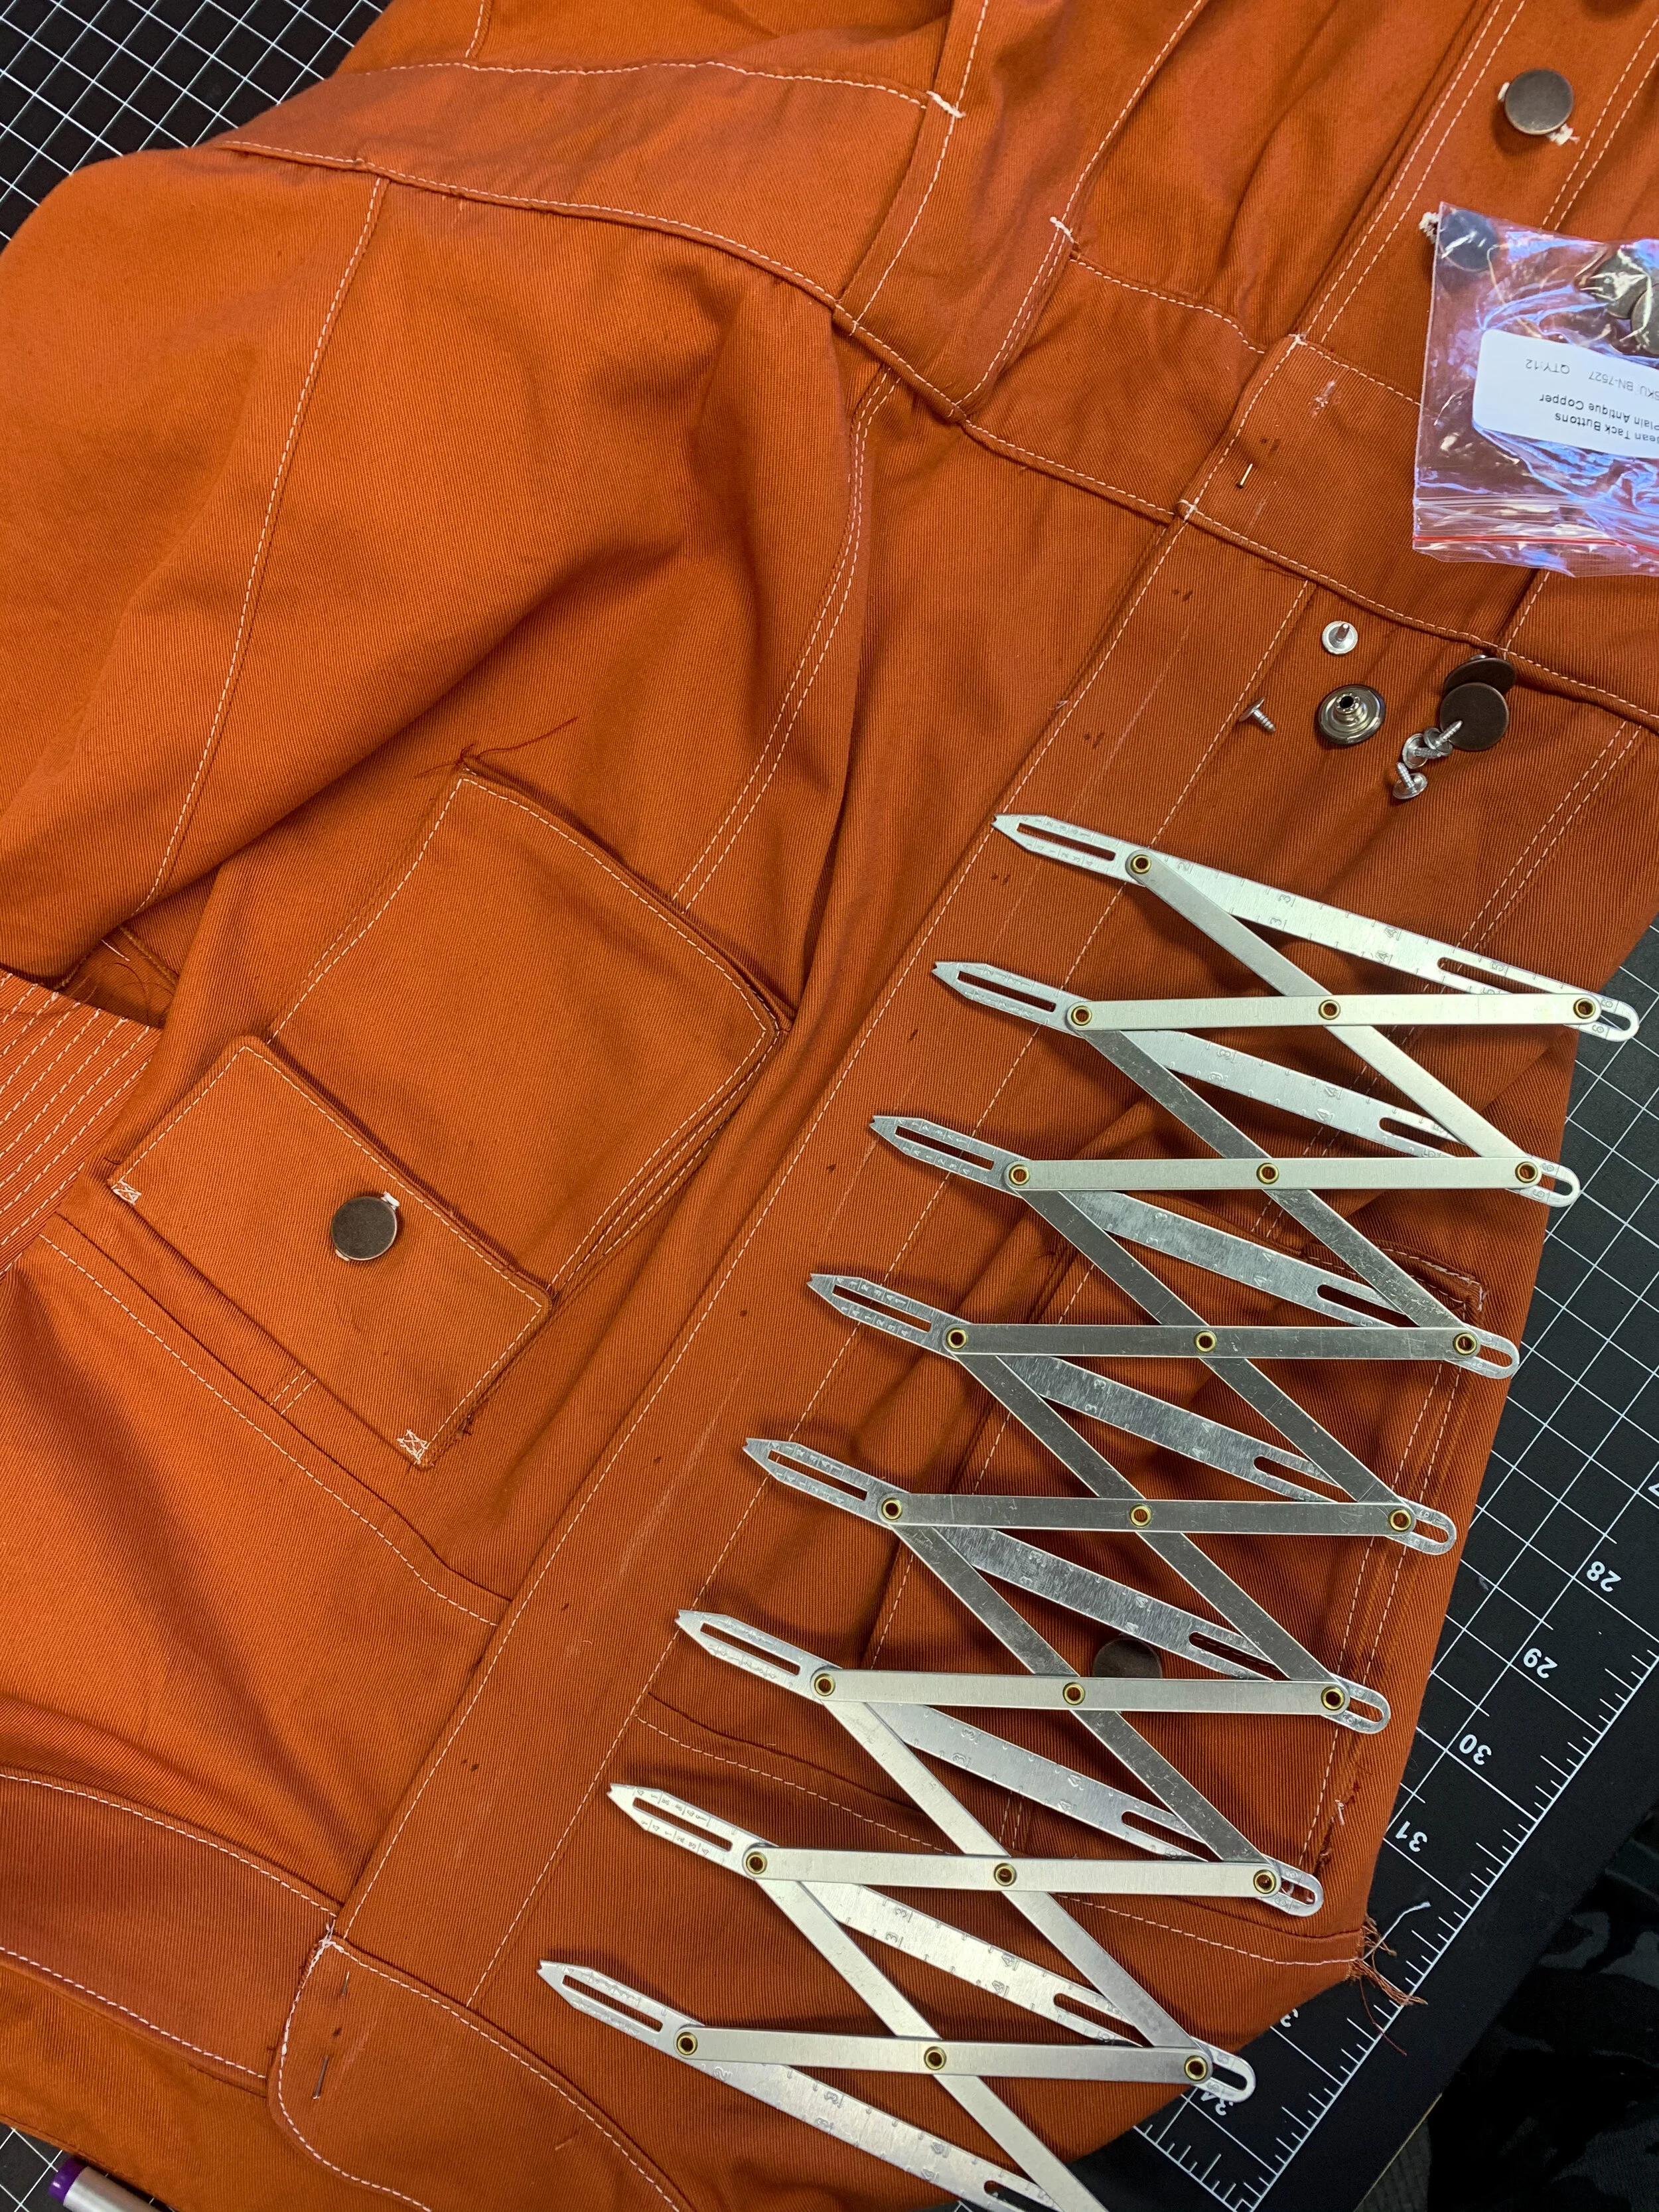
Expanding Sewing Gauge helps with the spacing of my button placements.
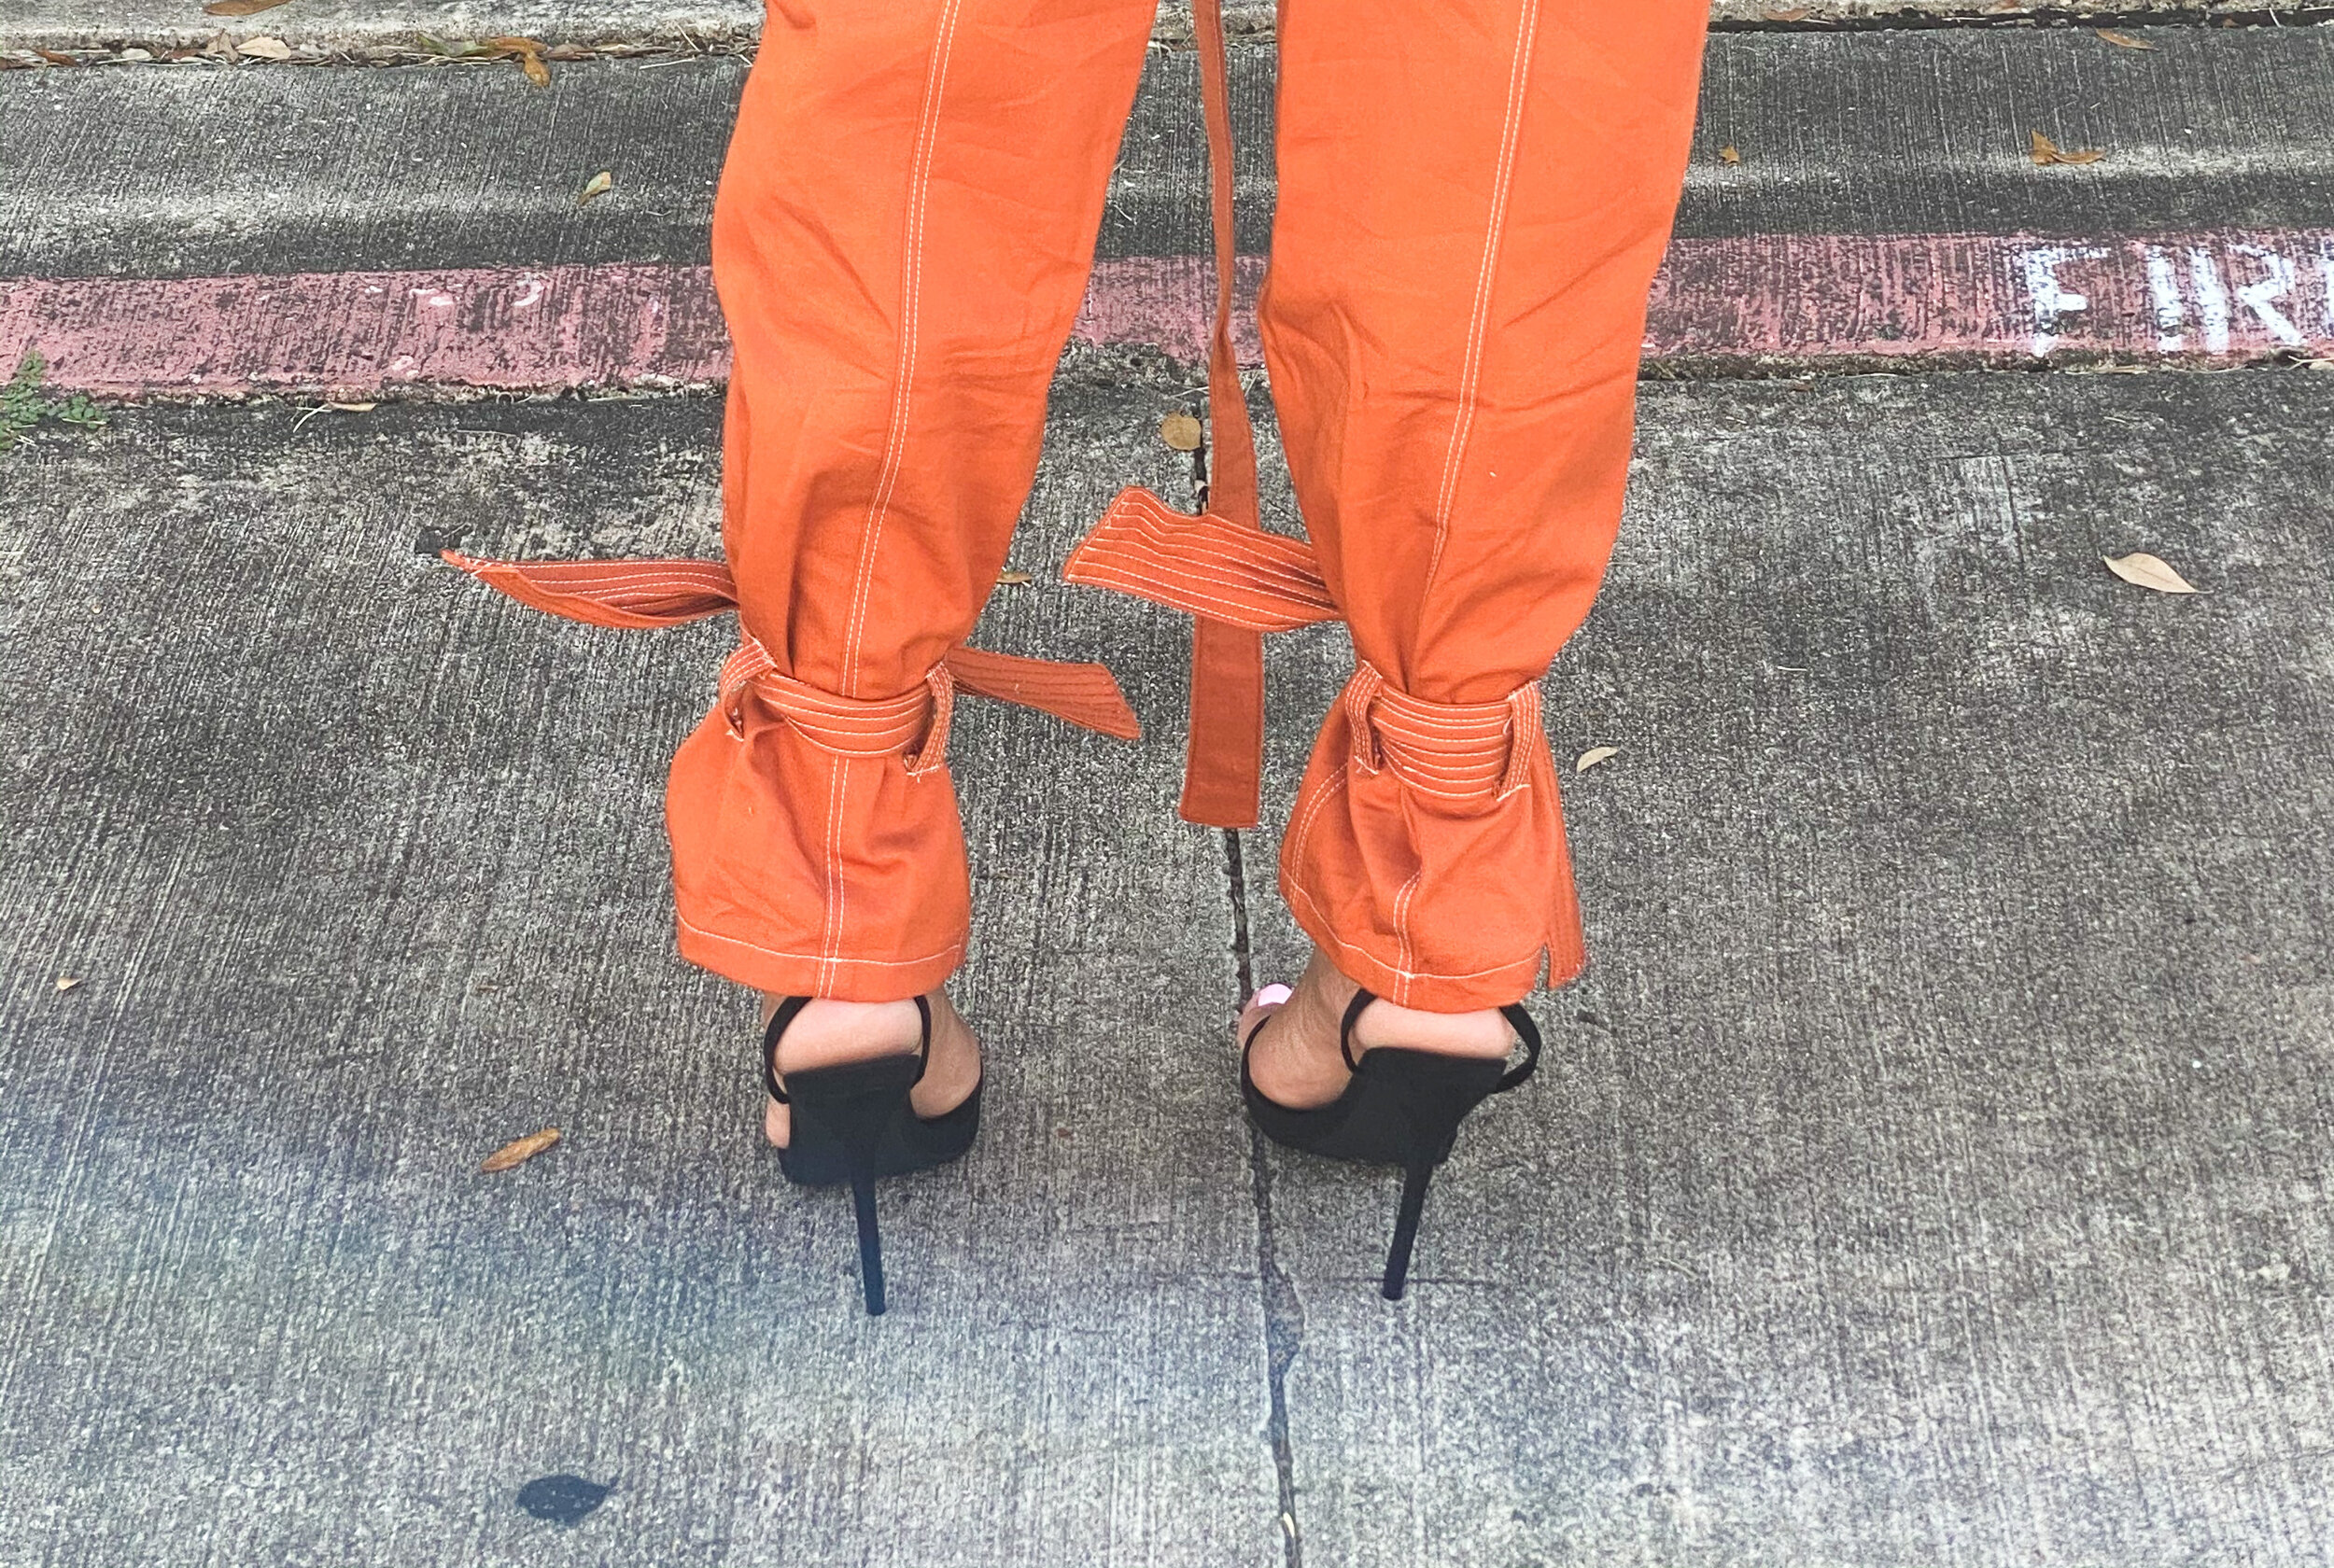
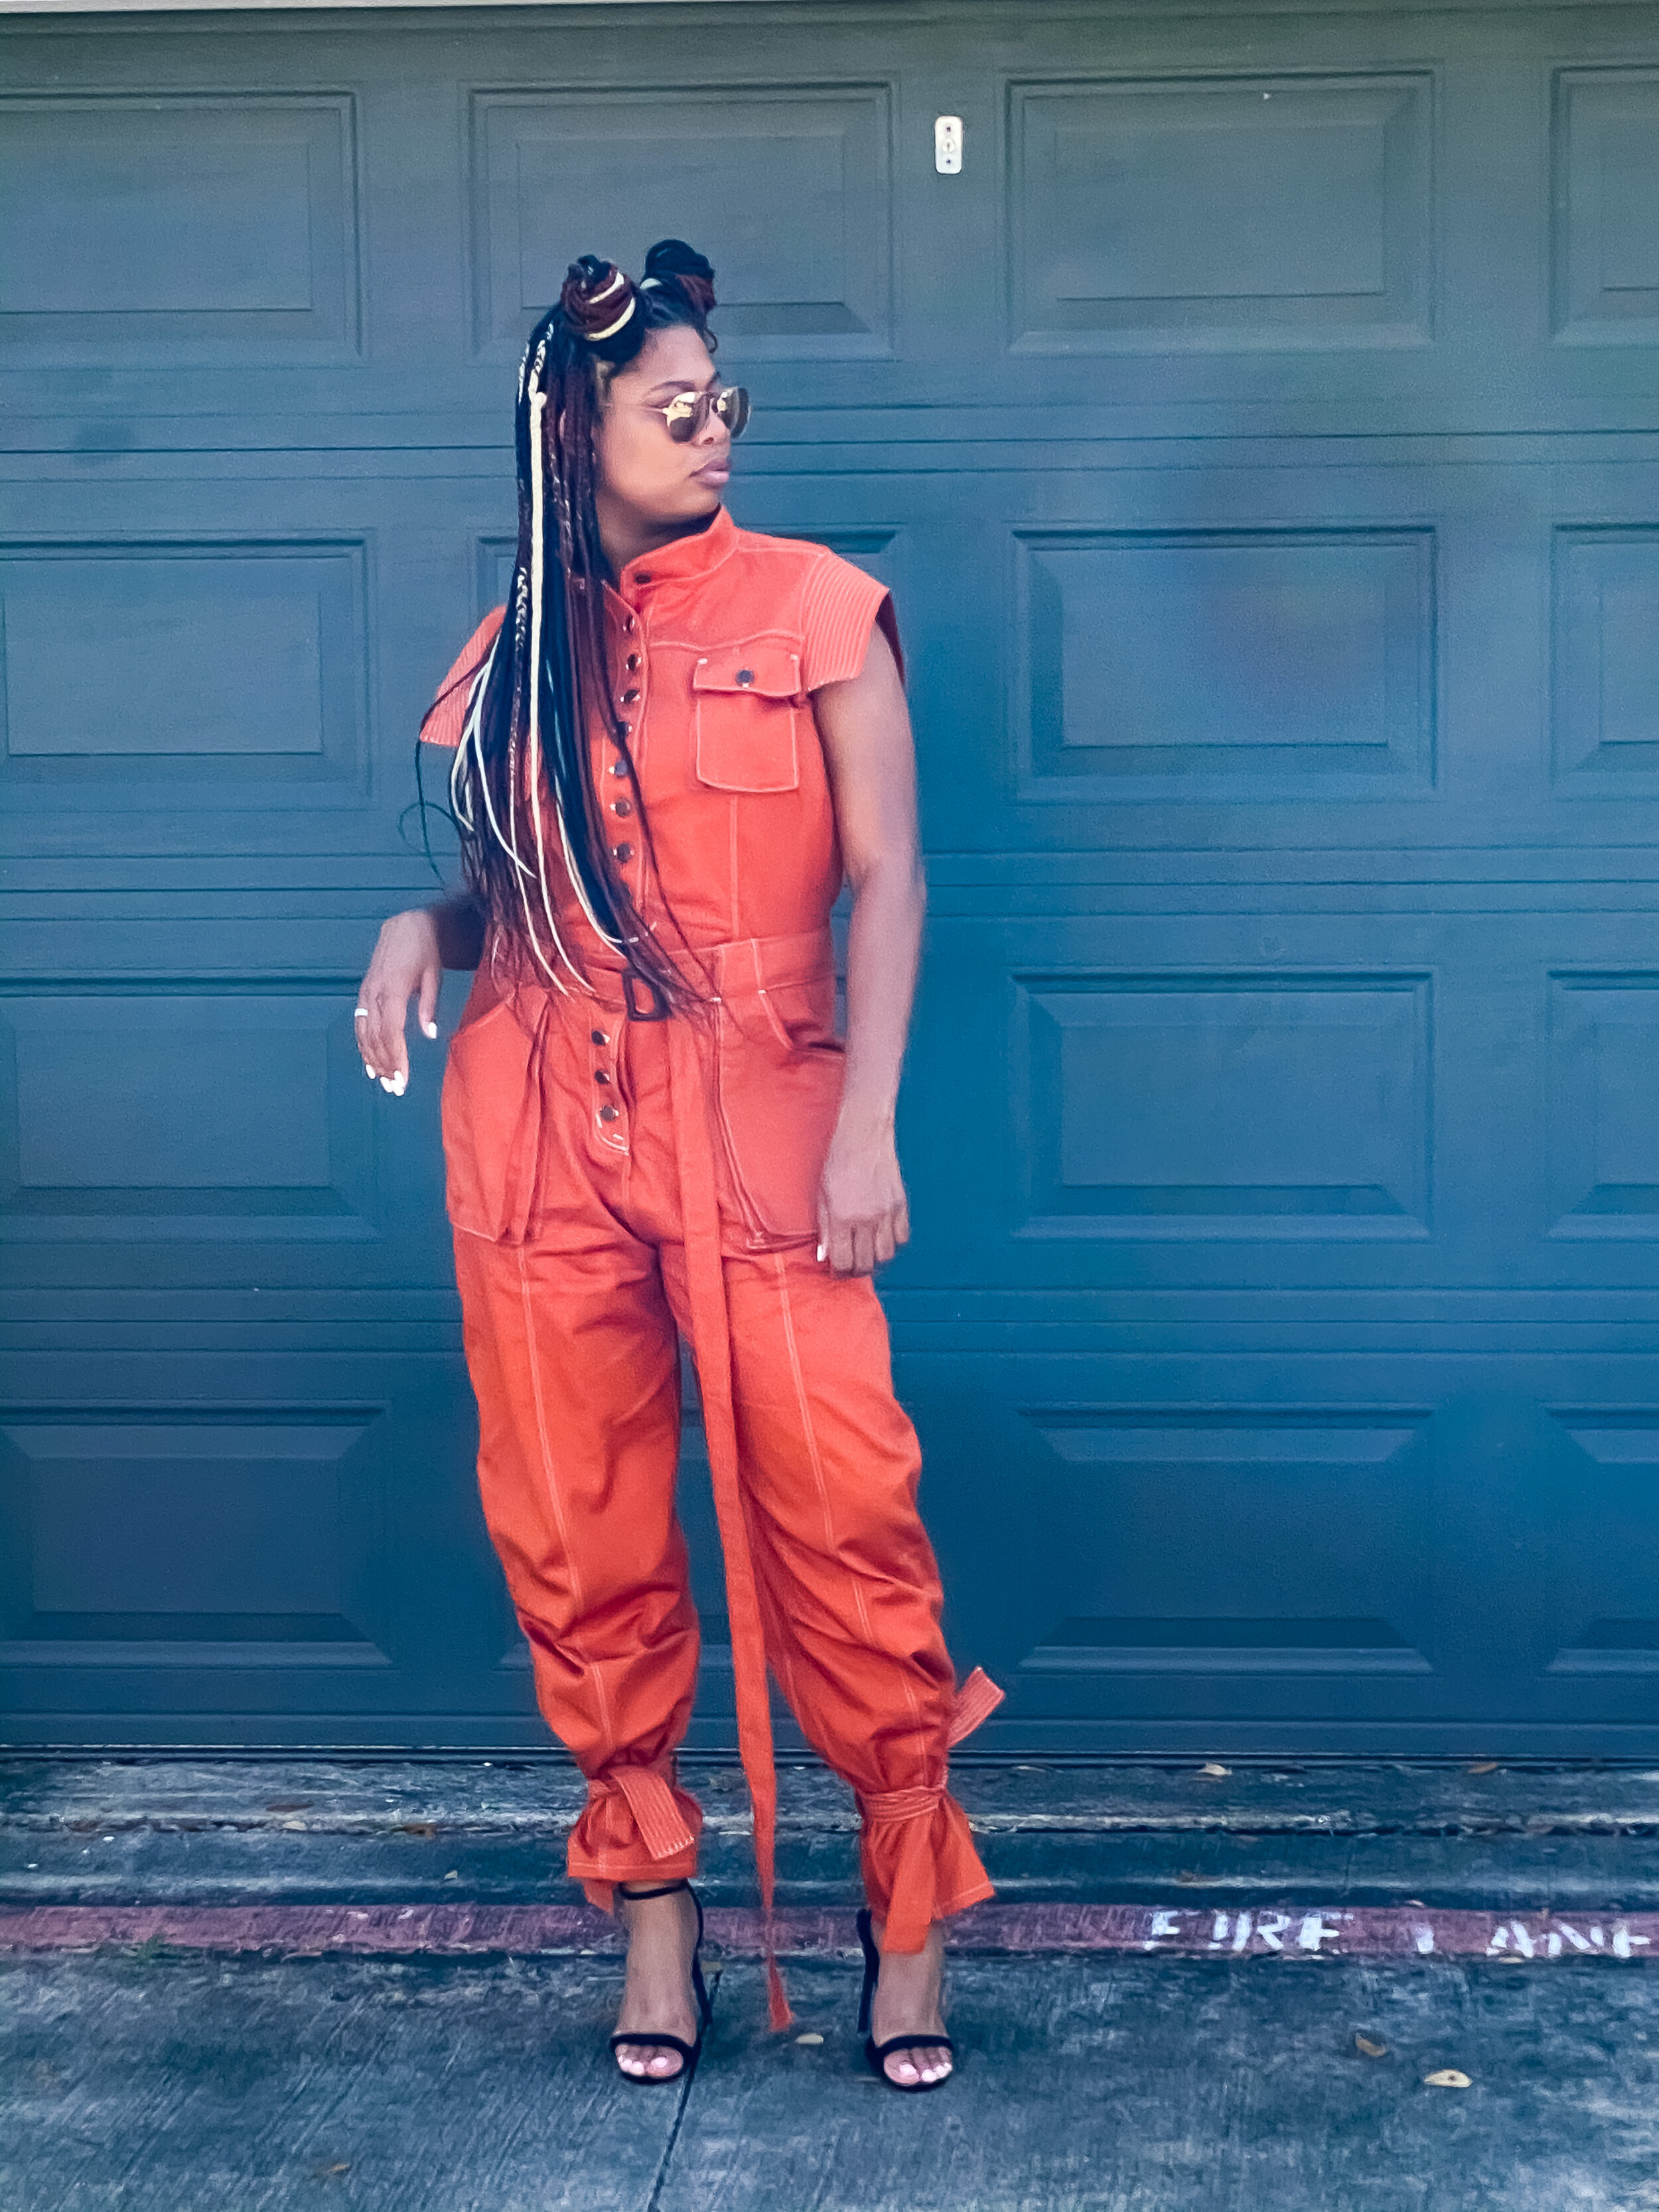
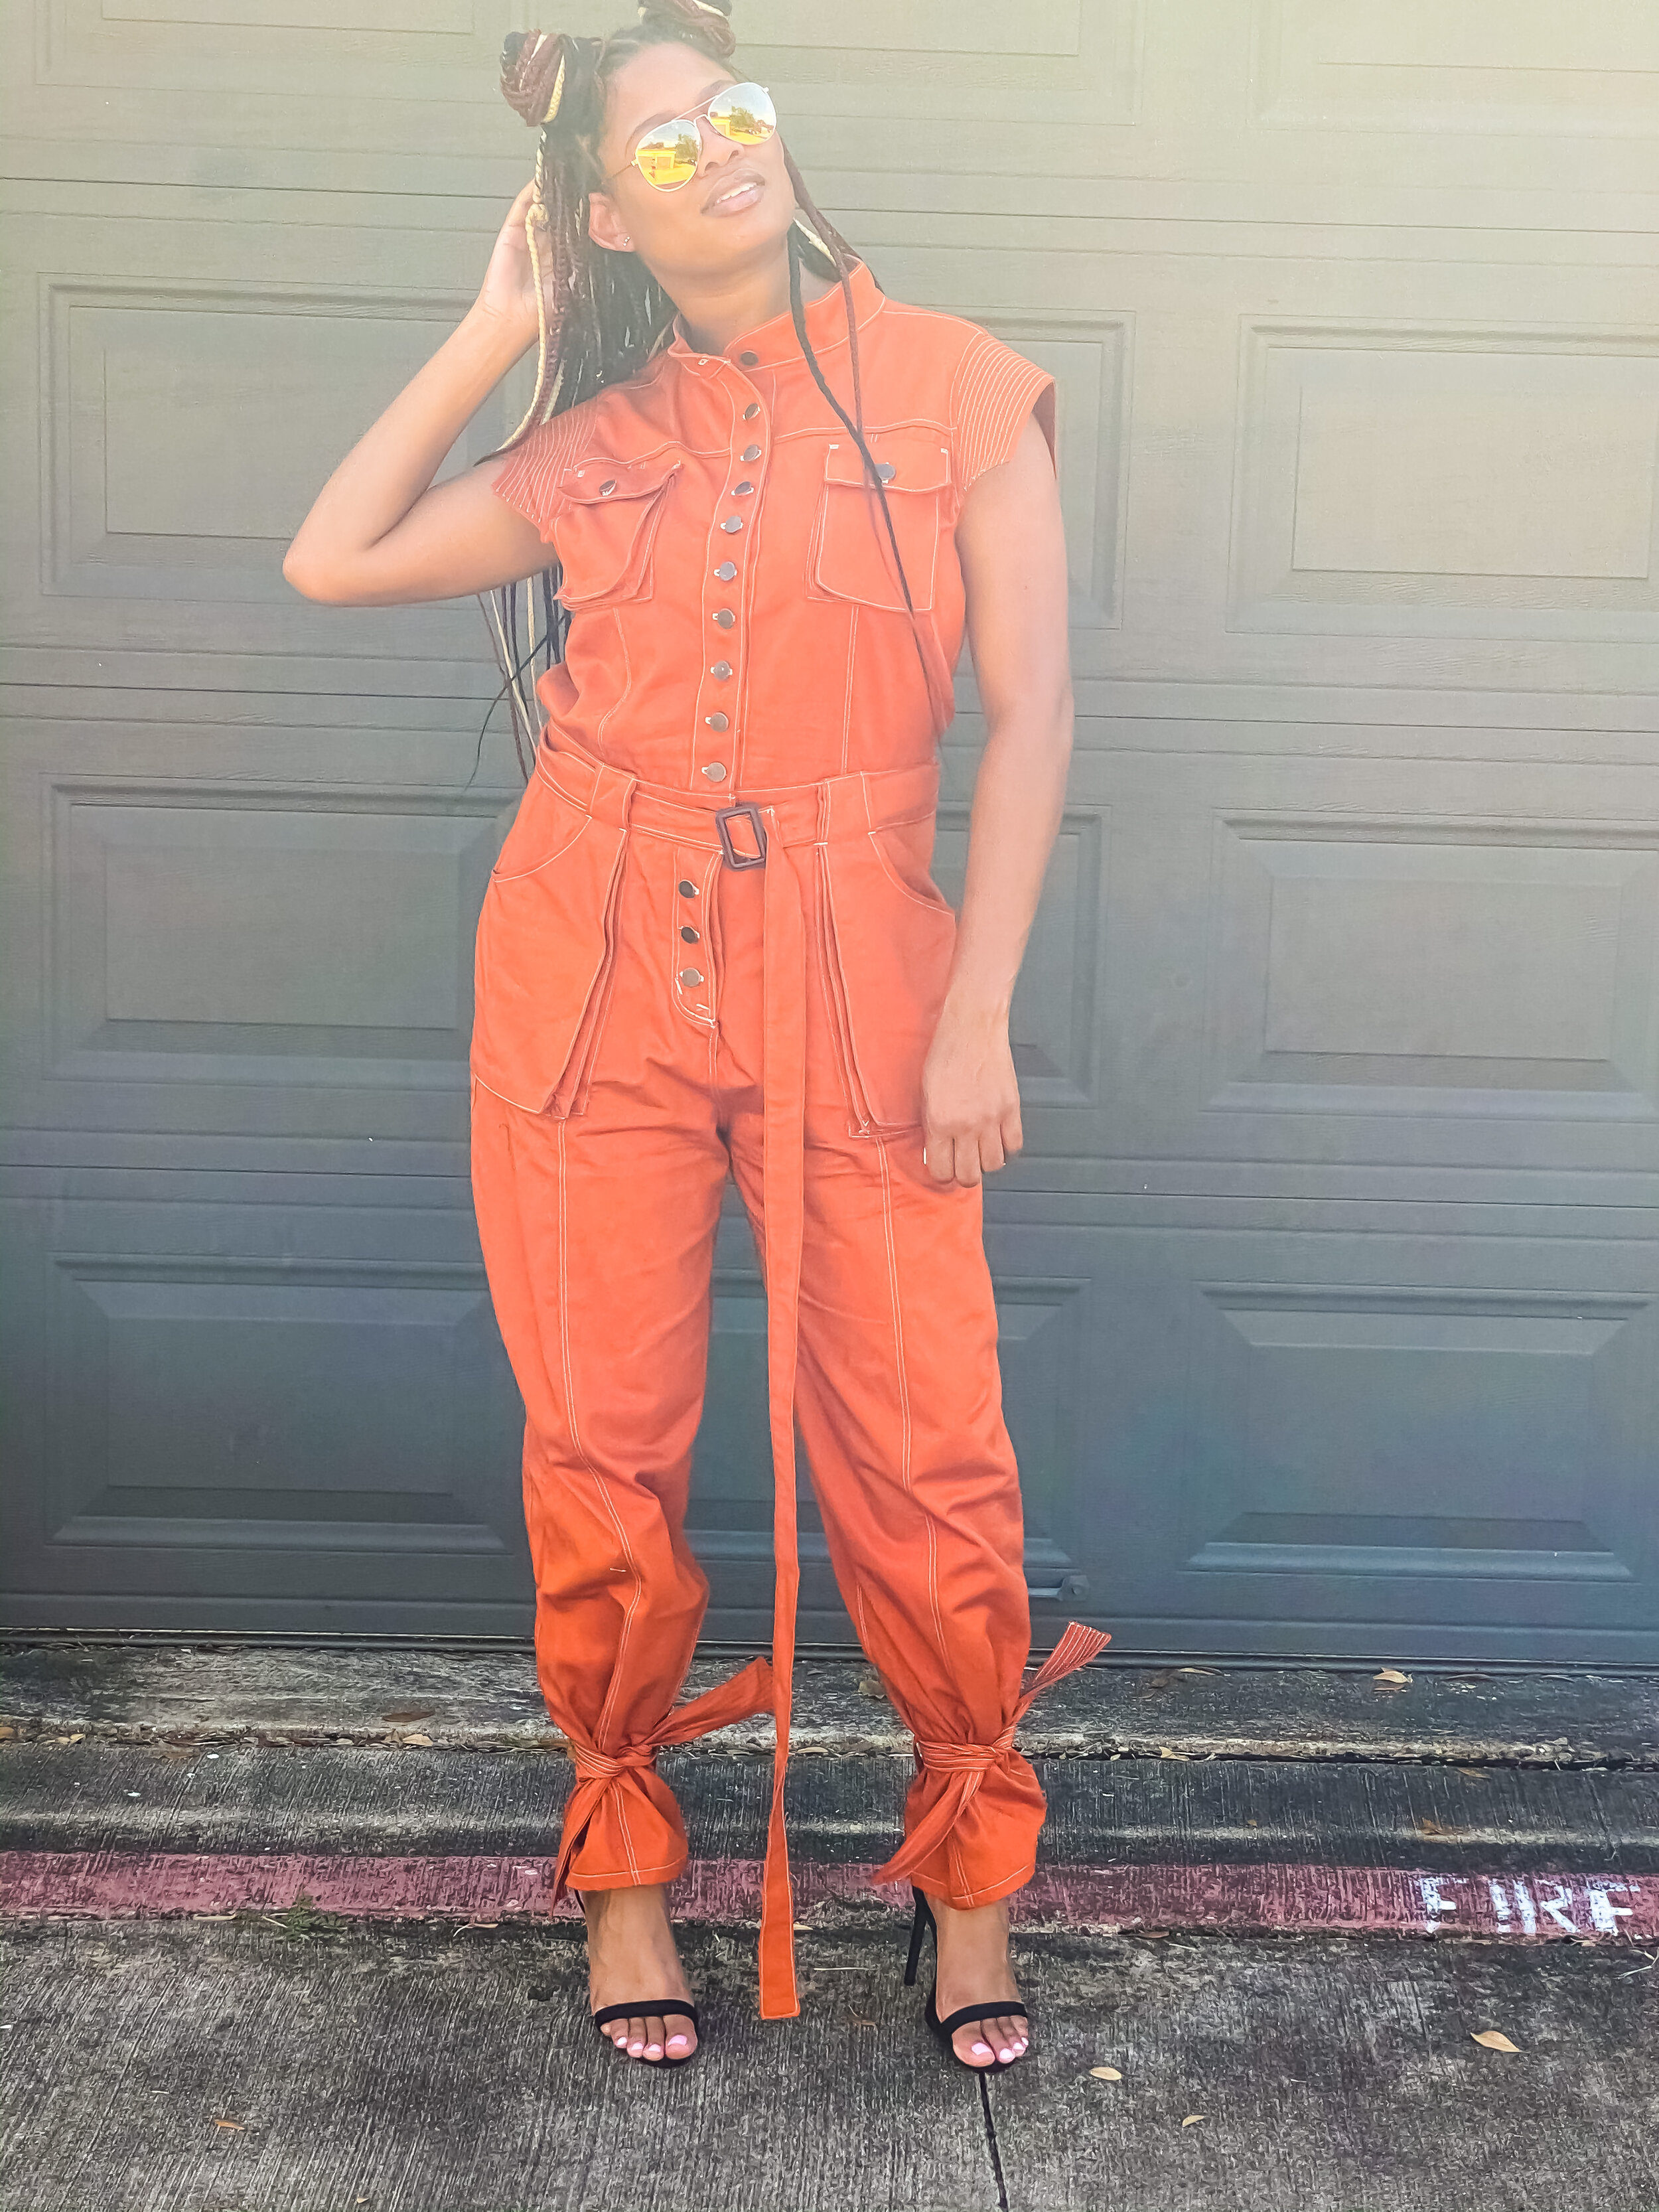
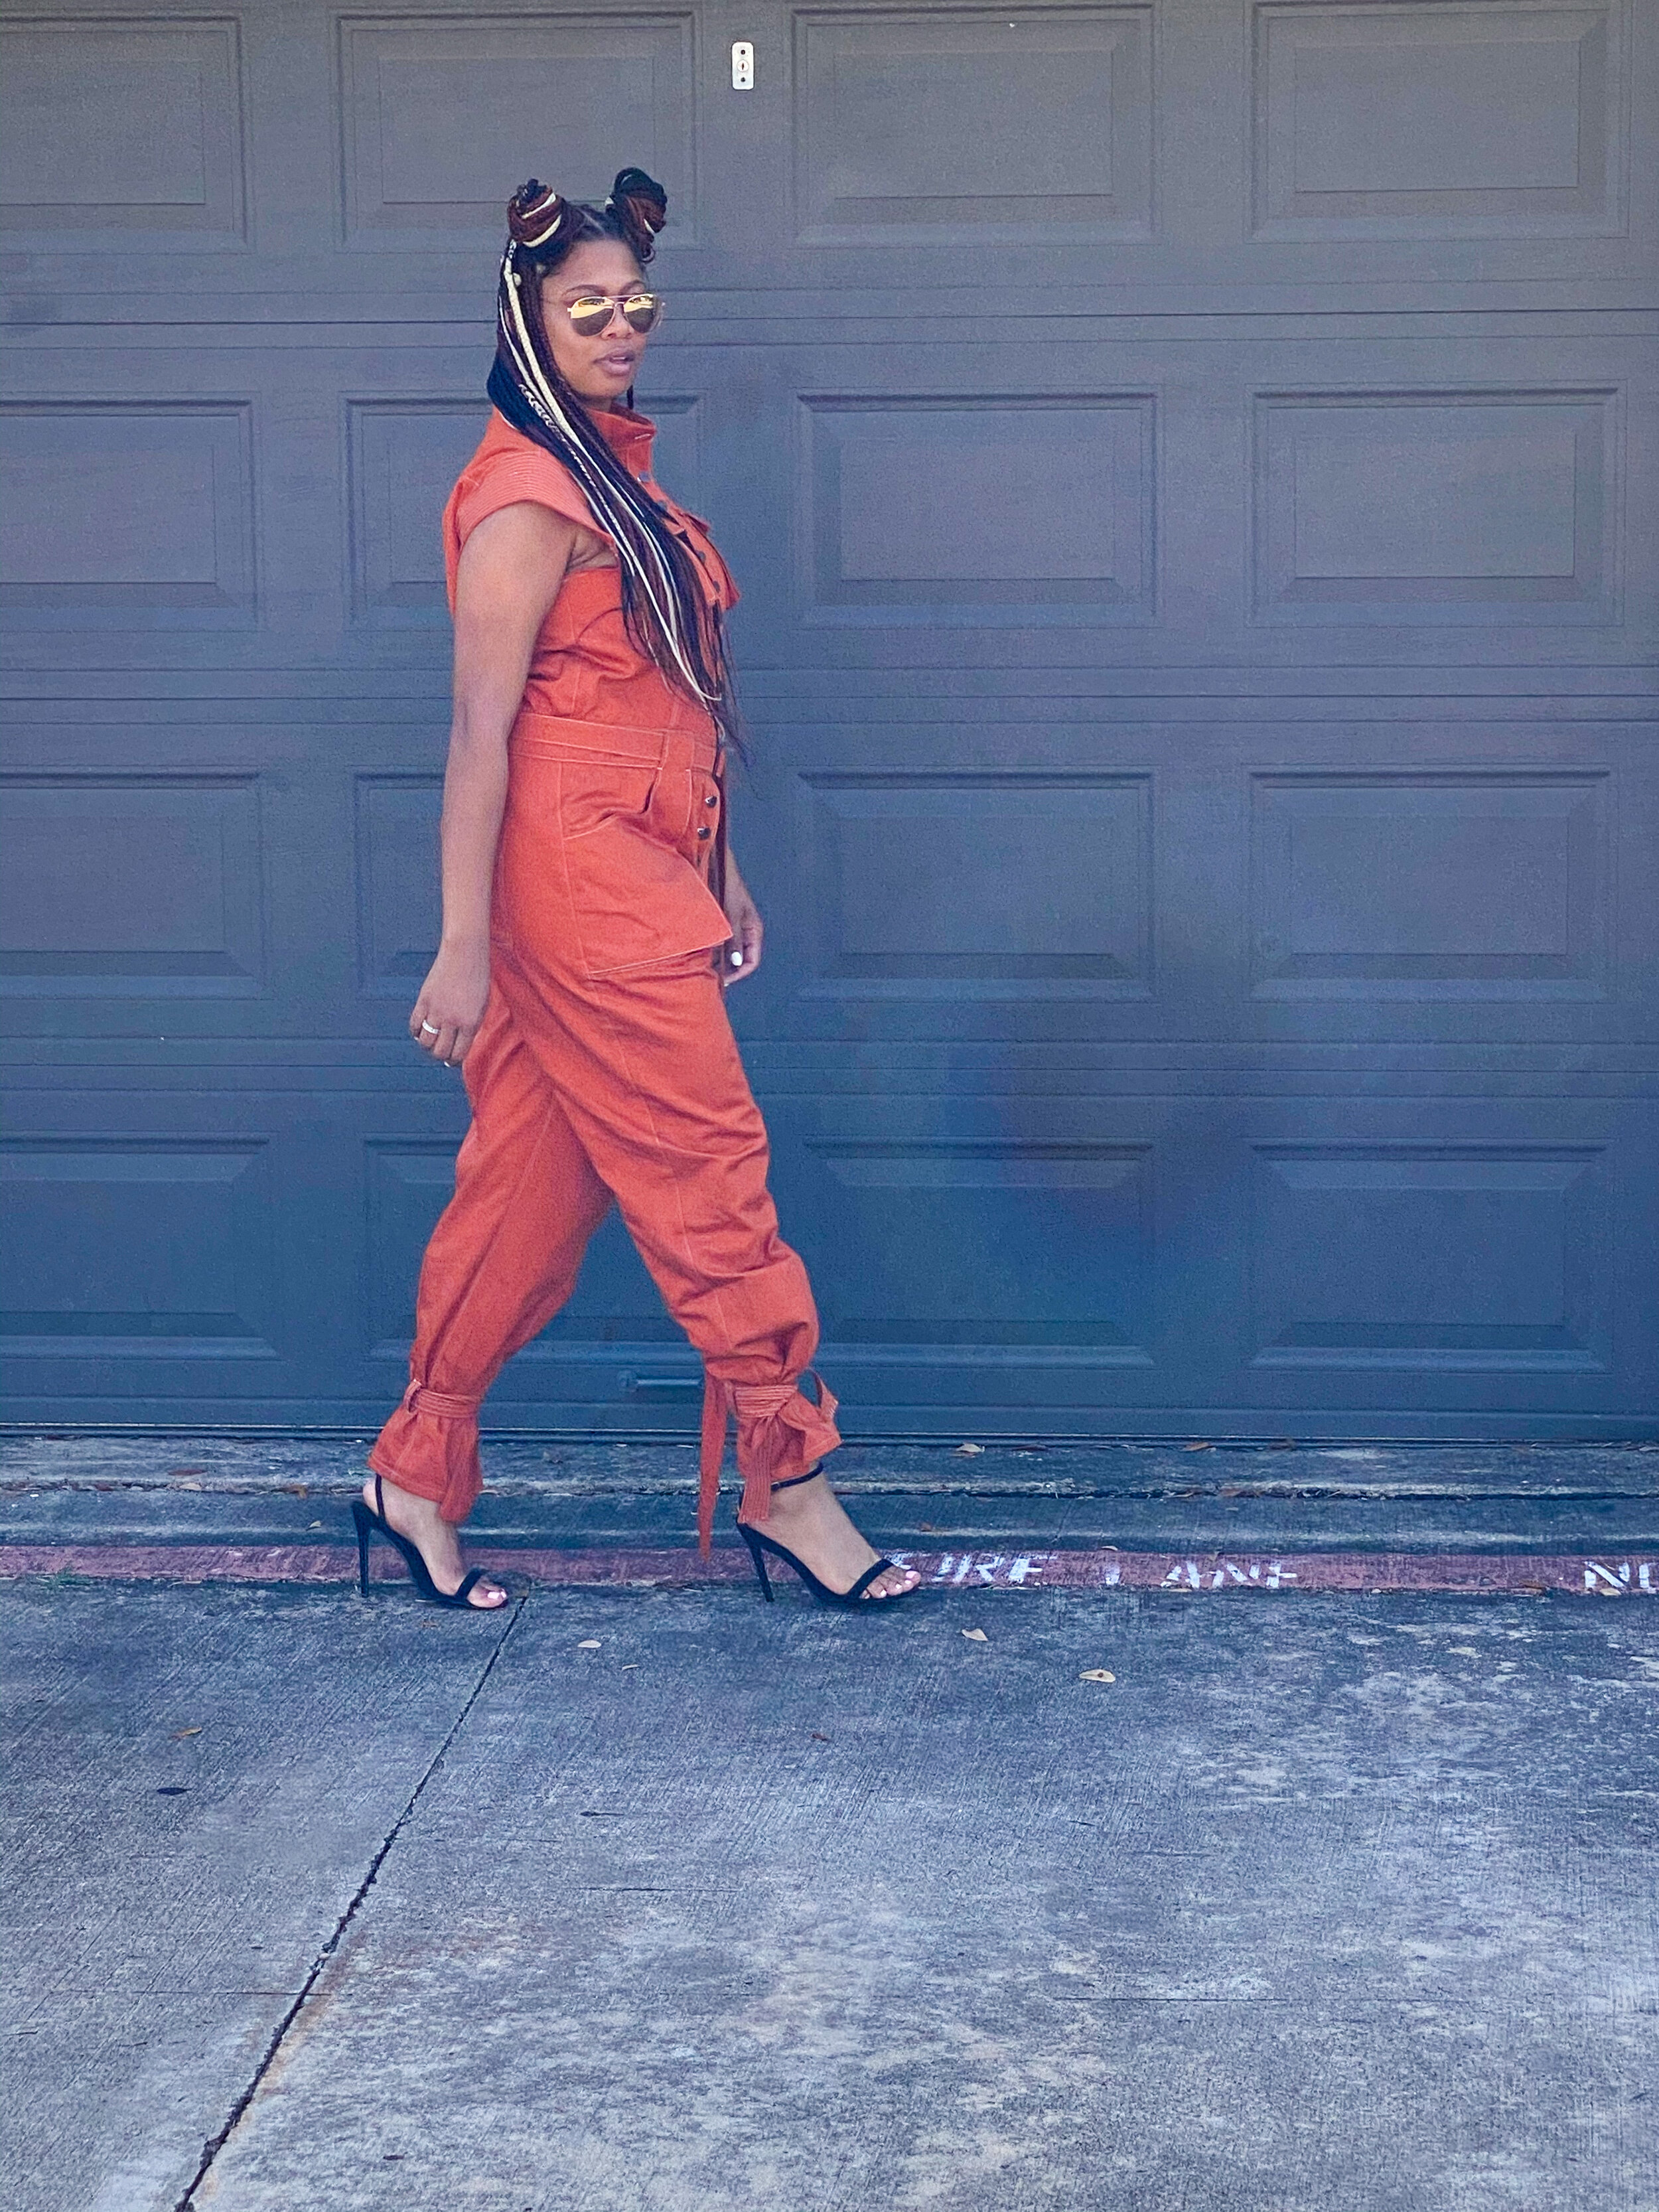
This utility suit came out even better than I imagined and I am actually really proud of myself for achieving this look. Some of my favorite details are the contrasting top stitching (I used a 1/16” and 1/4” edge foot). Accordion pockets to add extra dimension. The extended shoulders with topstitching. The double fly front, and the ankle ties.

Fresh off of the sewing machine.

Thanks for reading, til next time.
-Jazz
Follow me on Instagram @sewmuchjazz